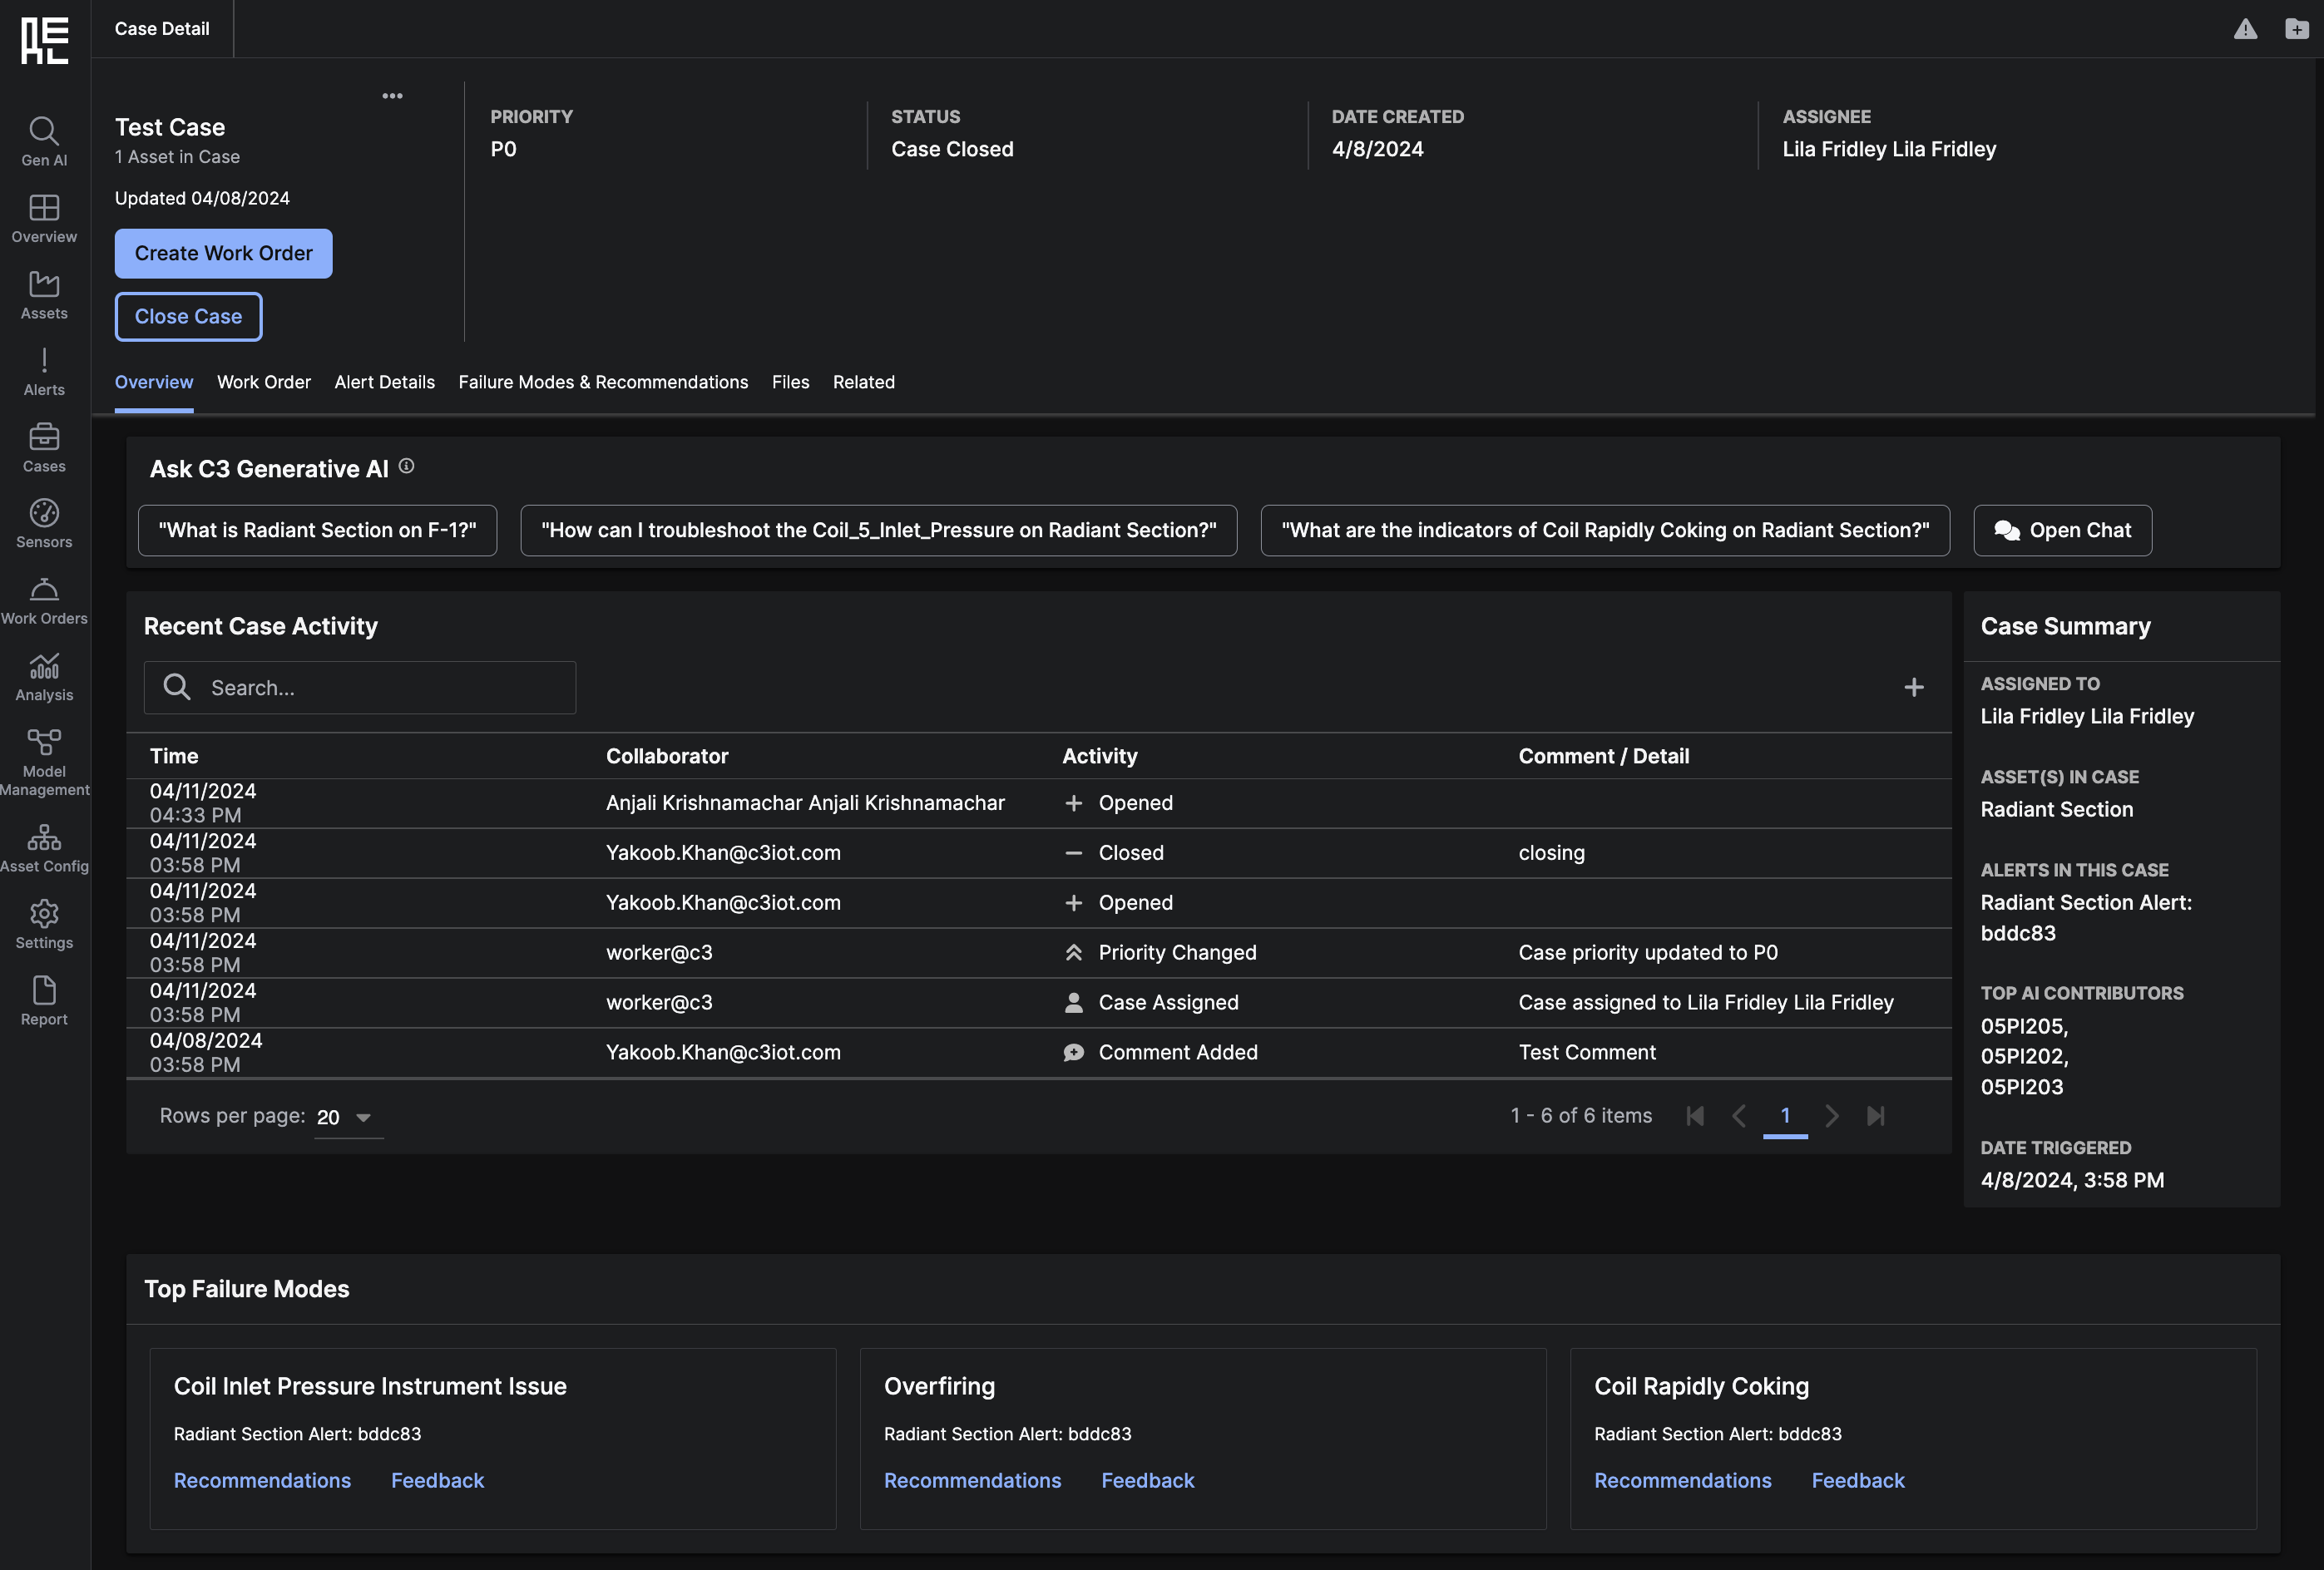
Case Detail Overview tab
 You can take various actions at the top of the Case Details Page:
- Create a
Work Orderto notify someone to take action to progress theCase. - Close the
Case- Note: All addedAlertsin theCasewill also close. - Add
Alert(s) to theCaseto trackAlertsthat likely have the same root cause. - Edit details about the
Case, including associatingAsset(s) to theCase, assigning aPriority, and assigning theCaseto someone. - Add an existing or new
Failure Modenot yet captured in theCase. - Reopen a closed
Casefor further investigation.
- Priority – displays the current
Casepriority. Possible priority values are:P0,P1, orP2. - Status - displays the current
Casestatus. Possible status values are:Open,Assigned,In Progress, orClosed. See Work with Cases for more details. - Date Created - displays the date a
Casewas created. - Assignee - displays the user name of the person assigned to work on a
Case.
Ask C3 Generative AI
The Ask C3 Generative AI section is the entry point to interact with the C3 Generative AI Chat. This section has several common questions that may help troubleshoot the alert. Clicking on any of the questions or clicking on the “Open Chat” button will open the C3 Generative AI Chat in the side panel. You can then press theSend button in the Chat to send the question.
The C3 Generative AI Chat will search for answers using the set of documents that have been uploaded and indexed for your C3 AI Reliability deployment. You can expect reasonable responses if you ask questions relevant to these documents. If you ask questions about topics ranging outside of these documents, the Chat may not return a relevant response (or may say “I don’t know the answer.”).
See C3 Generative AI Chat for more details about the C3 AI Generative Chat experience in the C3 AI Reliability application.
Recent Case Activity and Case Summary
The center of the page shows a log of allRecent Case Activity, sorted by date of activity. You can also add a comment to the case by clicking the add (plus) icon in the upper right corner of the grid table.
To the right of the grid table, there is a Case Summary, which contains the assigned person, associated Assets, added Alerts, top contributing Features, and creation date.
Top Failure Modes
The bottom of the page containsFailure Modes for the Case.
 Review the
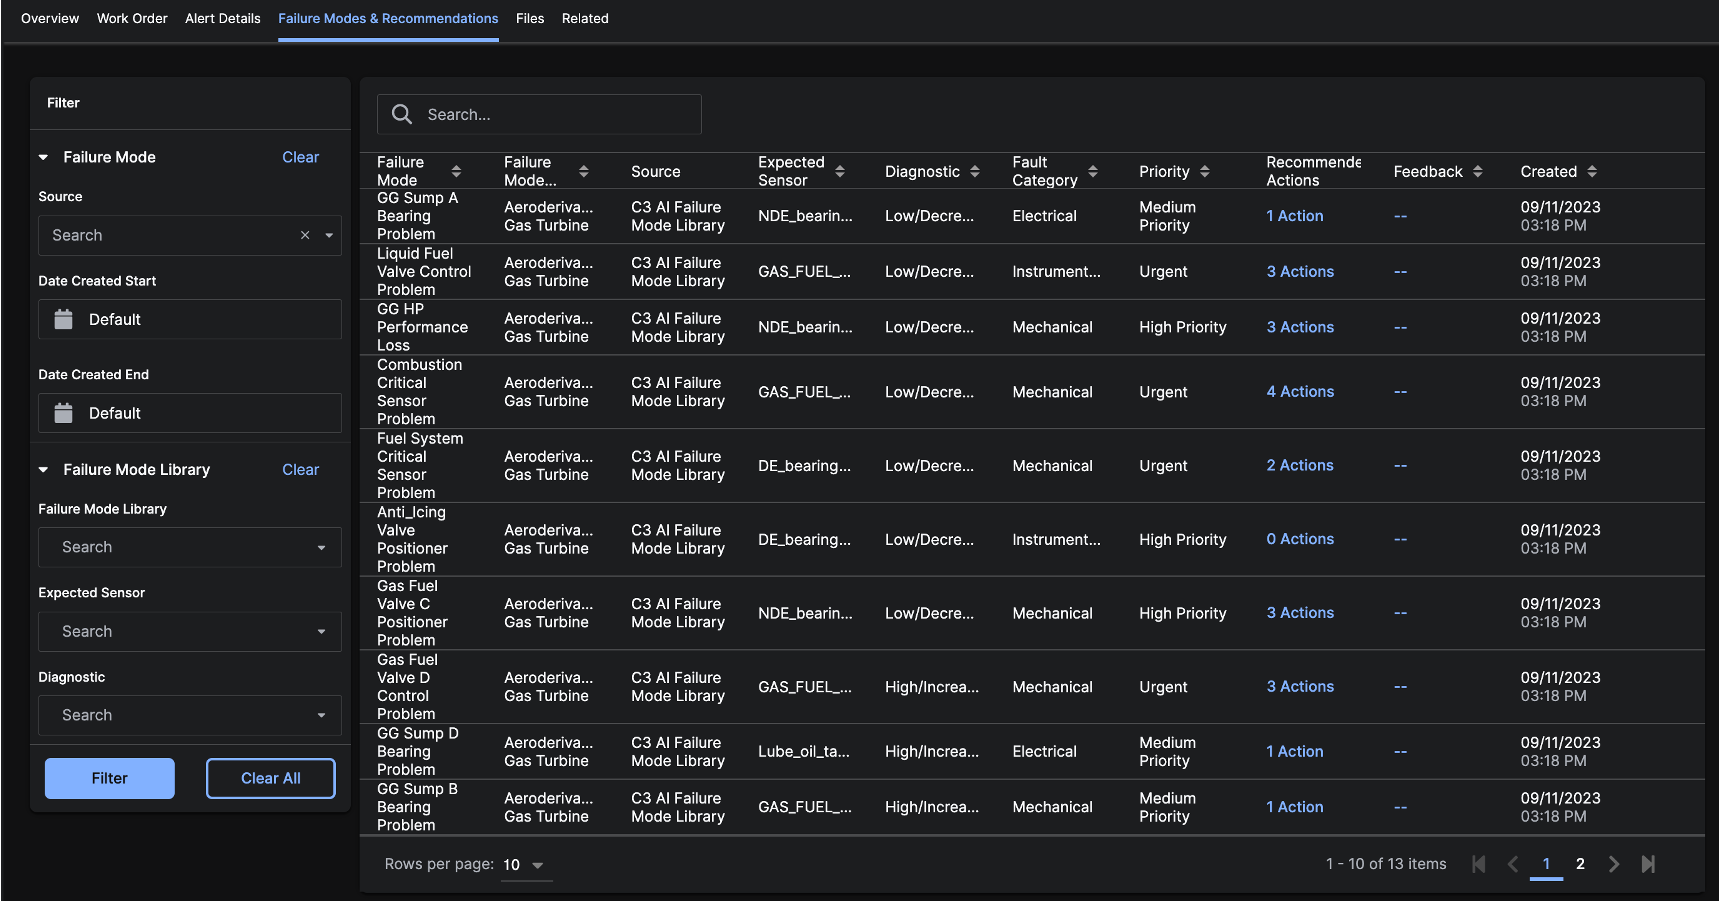
 Failure Modes and click Feedback to share whether the Failure Mode is accurate. You can also add additional Failure Modes via the dropdown action, shown above.
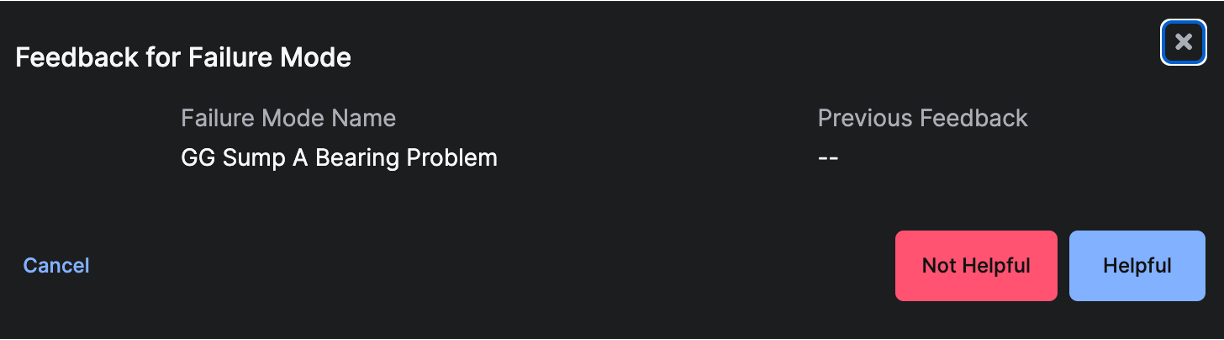 Click
Click Recommendations to view all Recommended Actions for a specific Failure Mode. You can also leave feedback on a Recommended Action to share if it is appropriate for the Failure Mode

Work Order tab
The Work Order tab displays allWork Orders that have been created for this Case.
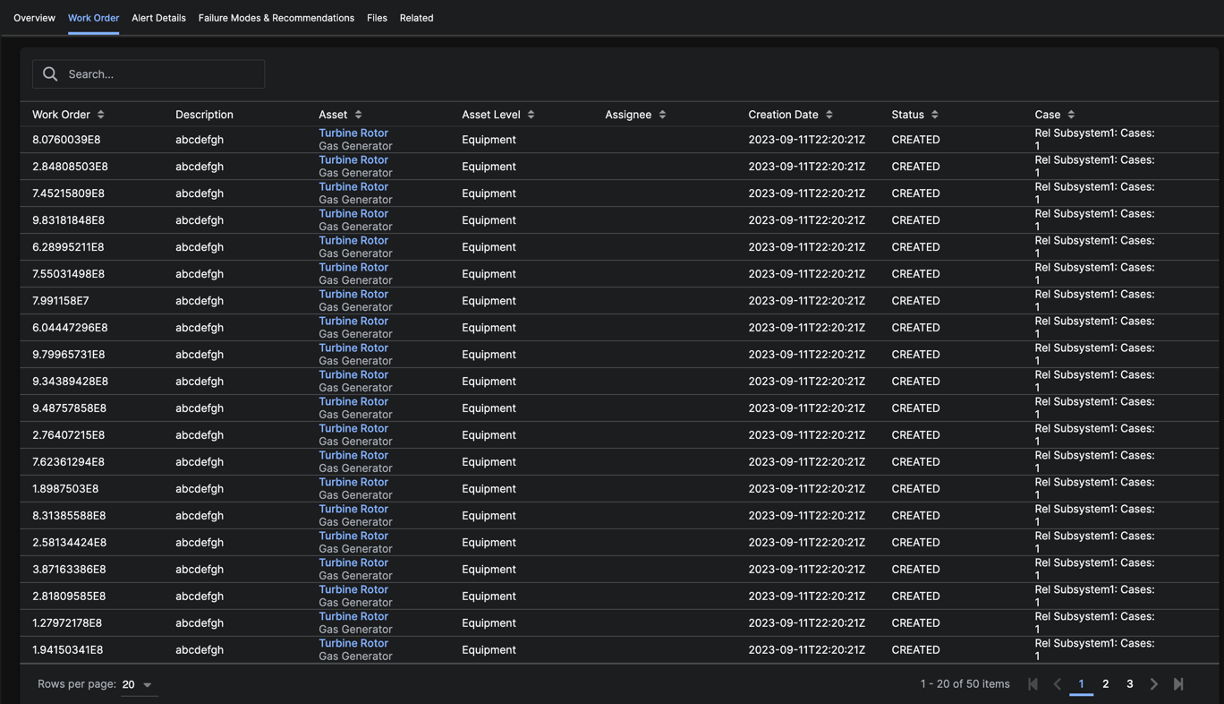 You create a work order when you need to dispatch a worker to look at equipment, sensors or other parts of the
 Asset where the Alert occurred. See the Create Work Orders section earlier in this guide for more details.
Alerts tab
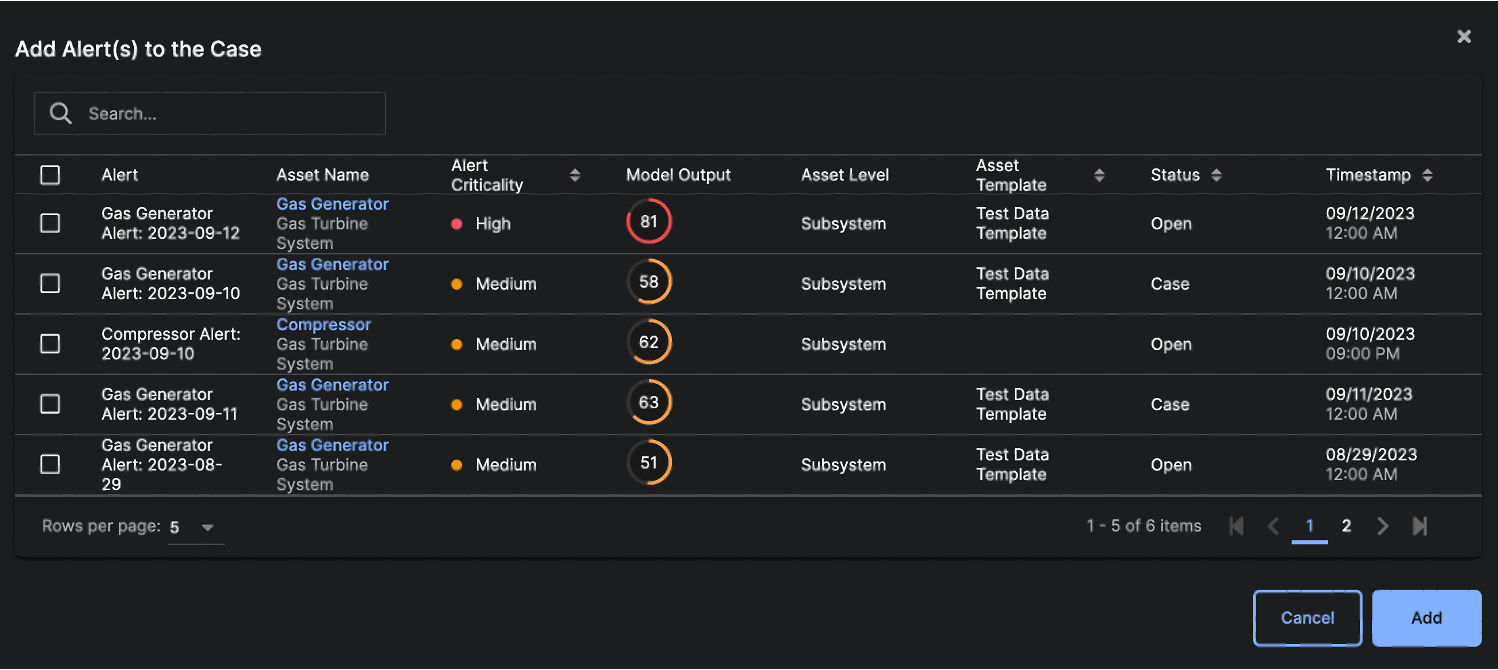
The Alerts tab shows all of theAlerts that have been added to the Case, sorted by Criticality. You can click on the Alert Name to redirect to the Alert Details Page.
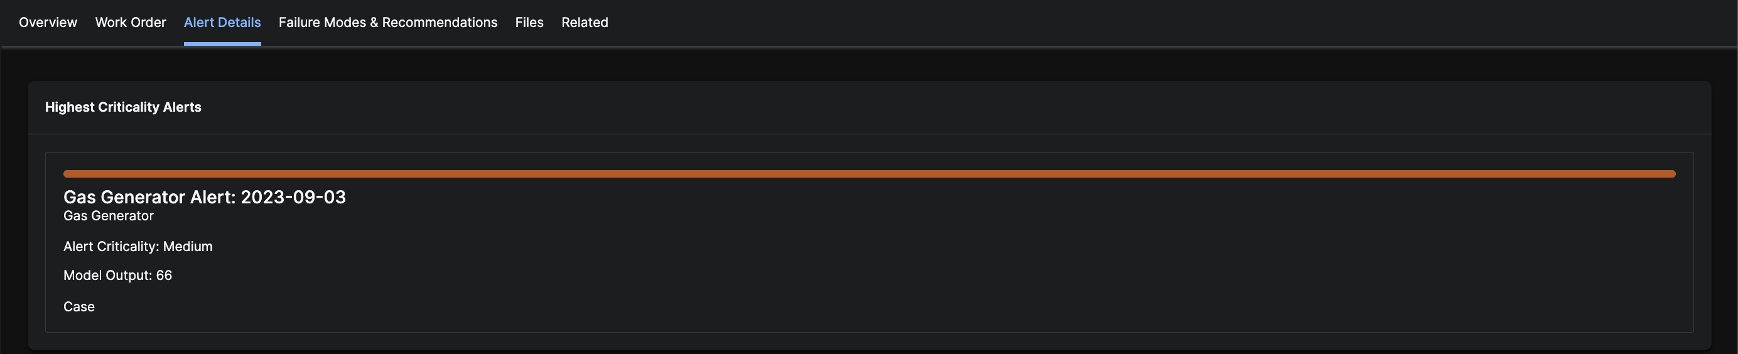
Connect to an Existing Alert
To connect your case to an existing alert:- Click the
...icon near the name of yourCasein the upper left corner. - Choose
Add Alert. - Search for an
Alertto add to yourCase. - Choose the
Alert(s) by selecting the checkbox(es) next to theAlert(s). - Click the Add button.
Failure Modes and Recommendations Tab
The Reliability application recommendsFailure Modes based on the behaviors of the contributing Features in the reliability risk model. You can delete a Failure Mode that is not relevant to the Case. You can also add additional Failure Modes that you’re considering throughout your Case investigation
Connect to an Existing Failure Mode
To connect yourCase to an existing Failure Mode:
- Click the
...icon near the name of yourCasein the upper left corner. - Click ‘Add Failure Mode’.
- The modal defaults to
Select Existing Failure Mode.
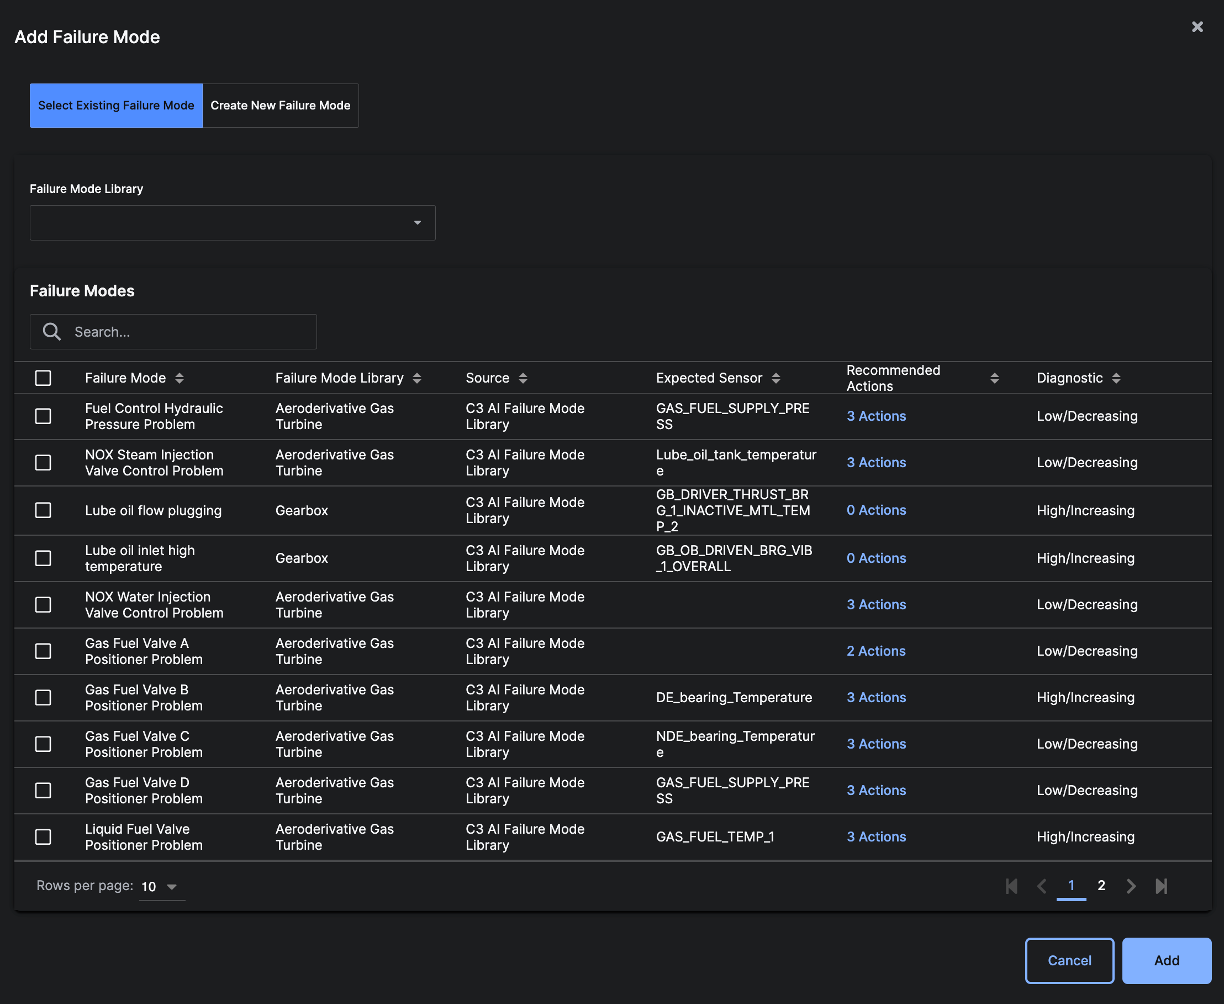
- Use the dropdown to select the Failure Mode Library that contains the mode you want to use. Alternatively, you can search and filter for the
Failure Modeby keyword in the Search field. - Select the checkbox(s) next to a
Failure Mode(s) that you want to add to yourCase. - Click Add.
Add a New Failure Mode
To connect yourCase to a new Failure Mode:
- Click the
...icon near the name of yourCasein the upper left corner. - Click ‘Add Failure Mode’.
- click ‘Create New Failure Mode’ at the top of the modal.
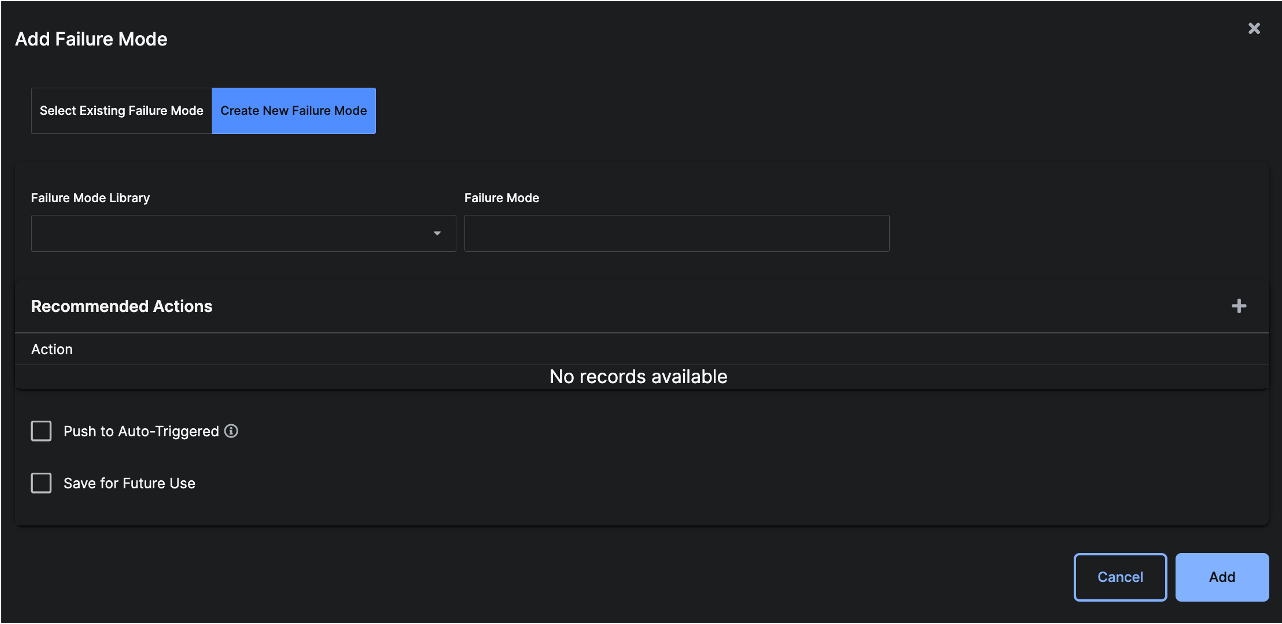
- Select a Failure Mode Library to which the new
Failure Modewill be added. - Type in the name of your
Failure Mode. - Click the add (plus) icon at the far right side of the
Recommended Actionssection to add a new action. Click the add (plus) icon for every action you want to add. - Select the ‘Push to Auto-Triggered’ checkbox if you want the
Failure Modeto trigger and alert when specific events occur. Select values from the dropdowns and select the parameters to specify the events. - Select the
Save for Future Usecheckbox if you want to make thisFailure Modeavailable for use with otherCases. - Click Add.
Files tab
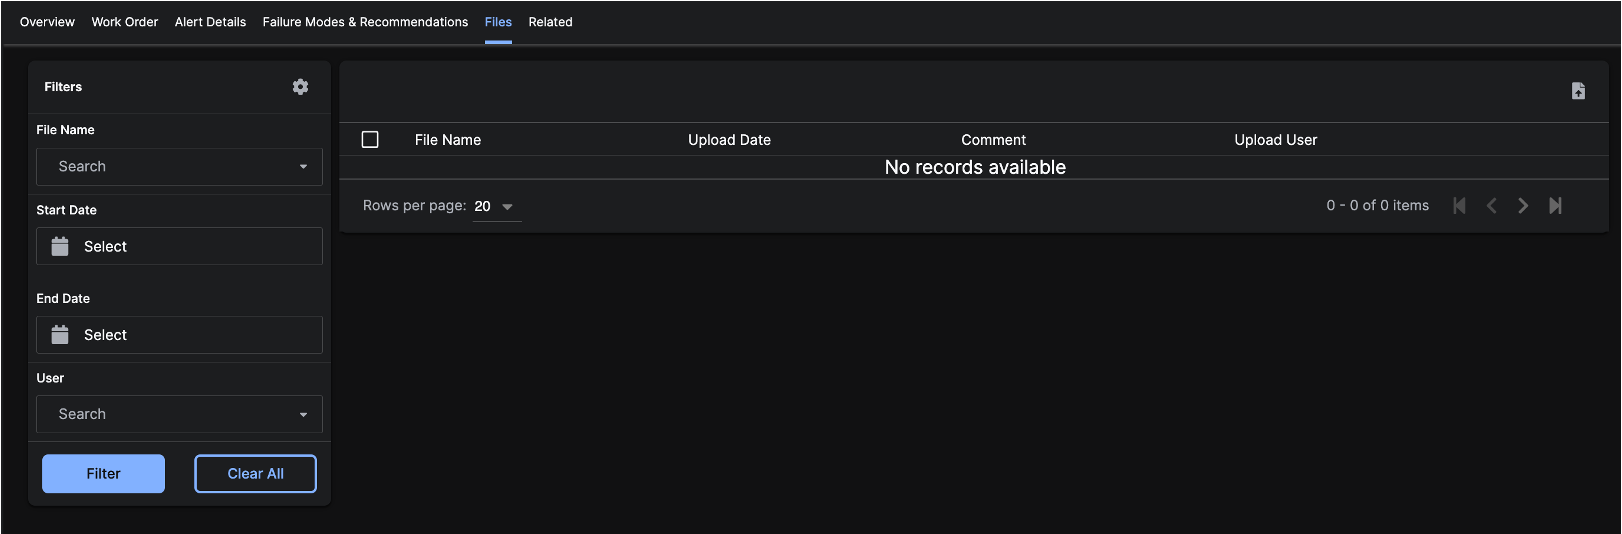
The Files tab contains all uploaded files that have been added to theCase. You can upload a file by clicking the upload (page with up arrow) icon. Next to each file, you can download the File for viewing or delete the File from the Case.
Related tab
The Related tab displays Alerts that are related with theAlerts in the Case based on similarity in Feature Contributions.
