The P&ID Page gives you the ability to upload your facility P&IDs to the application. TheDocumentation Index
Fetch the complete documentation index at: https://devdocs-shaunak-branch.mintlify.app/llms.txt
Use this file to discover all available pages before exploring further.
Diagram Parsing workflow then extracts the sensor information within the P&IDs and matches the data to the appropriate data historian files that have been ingested as part of the standard C3 AI Reliability data integration process.
P&ID Overview
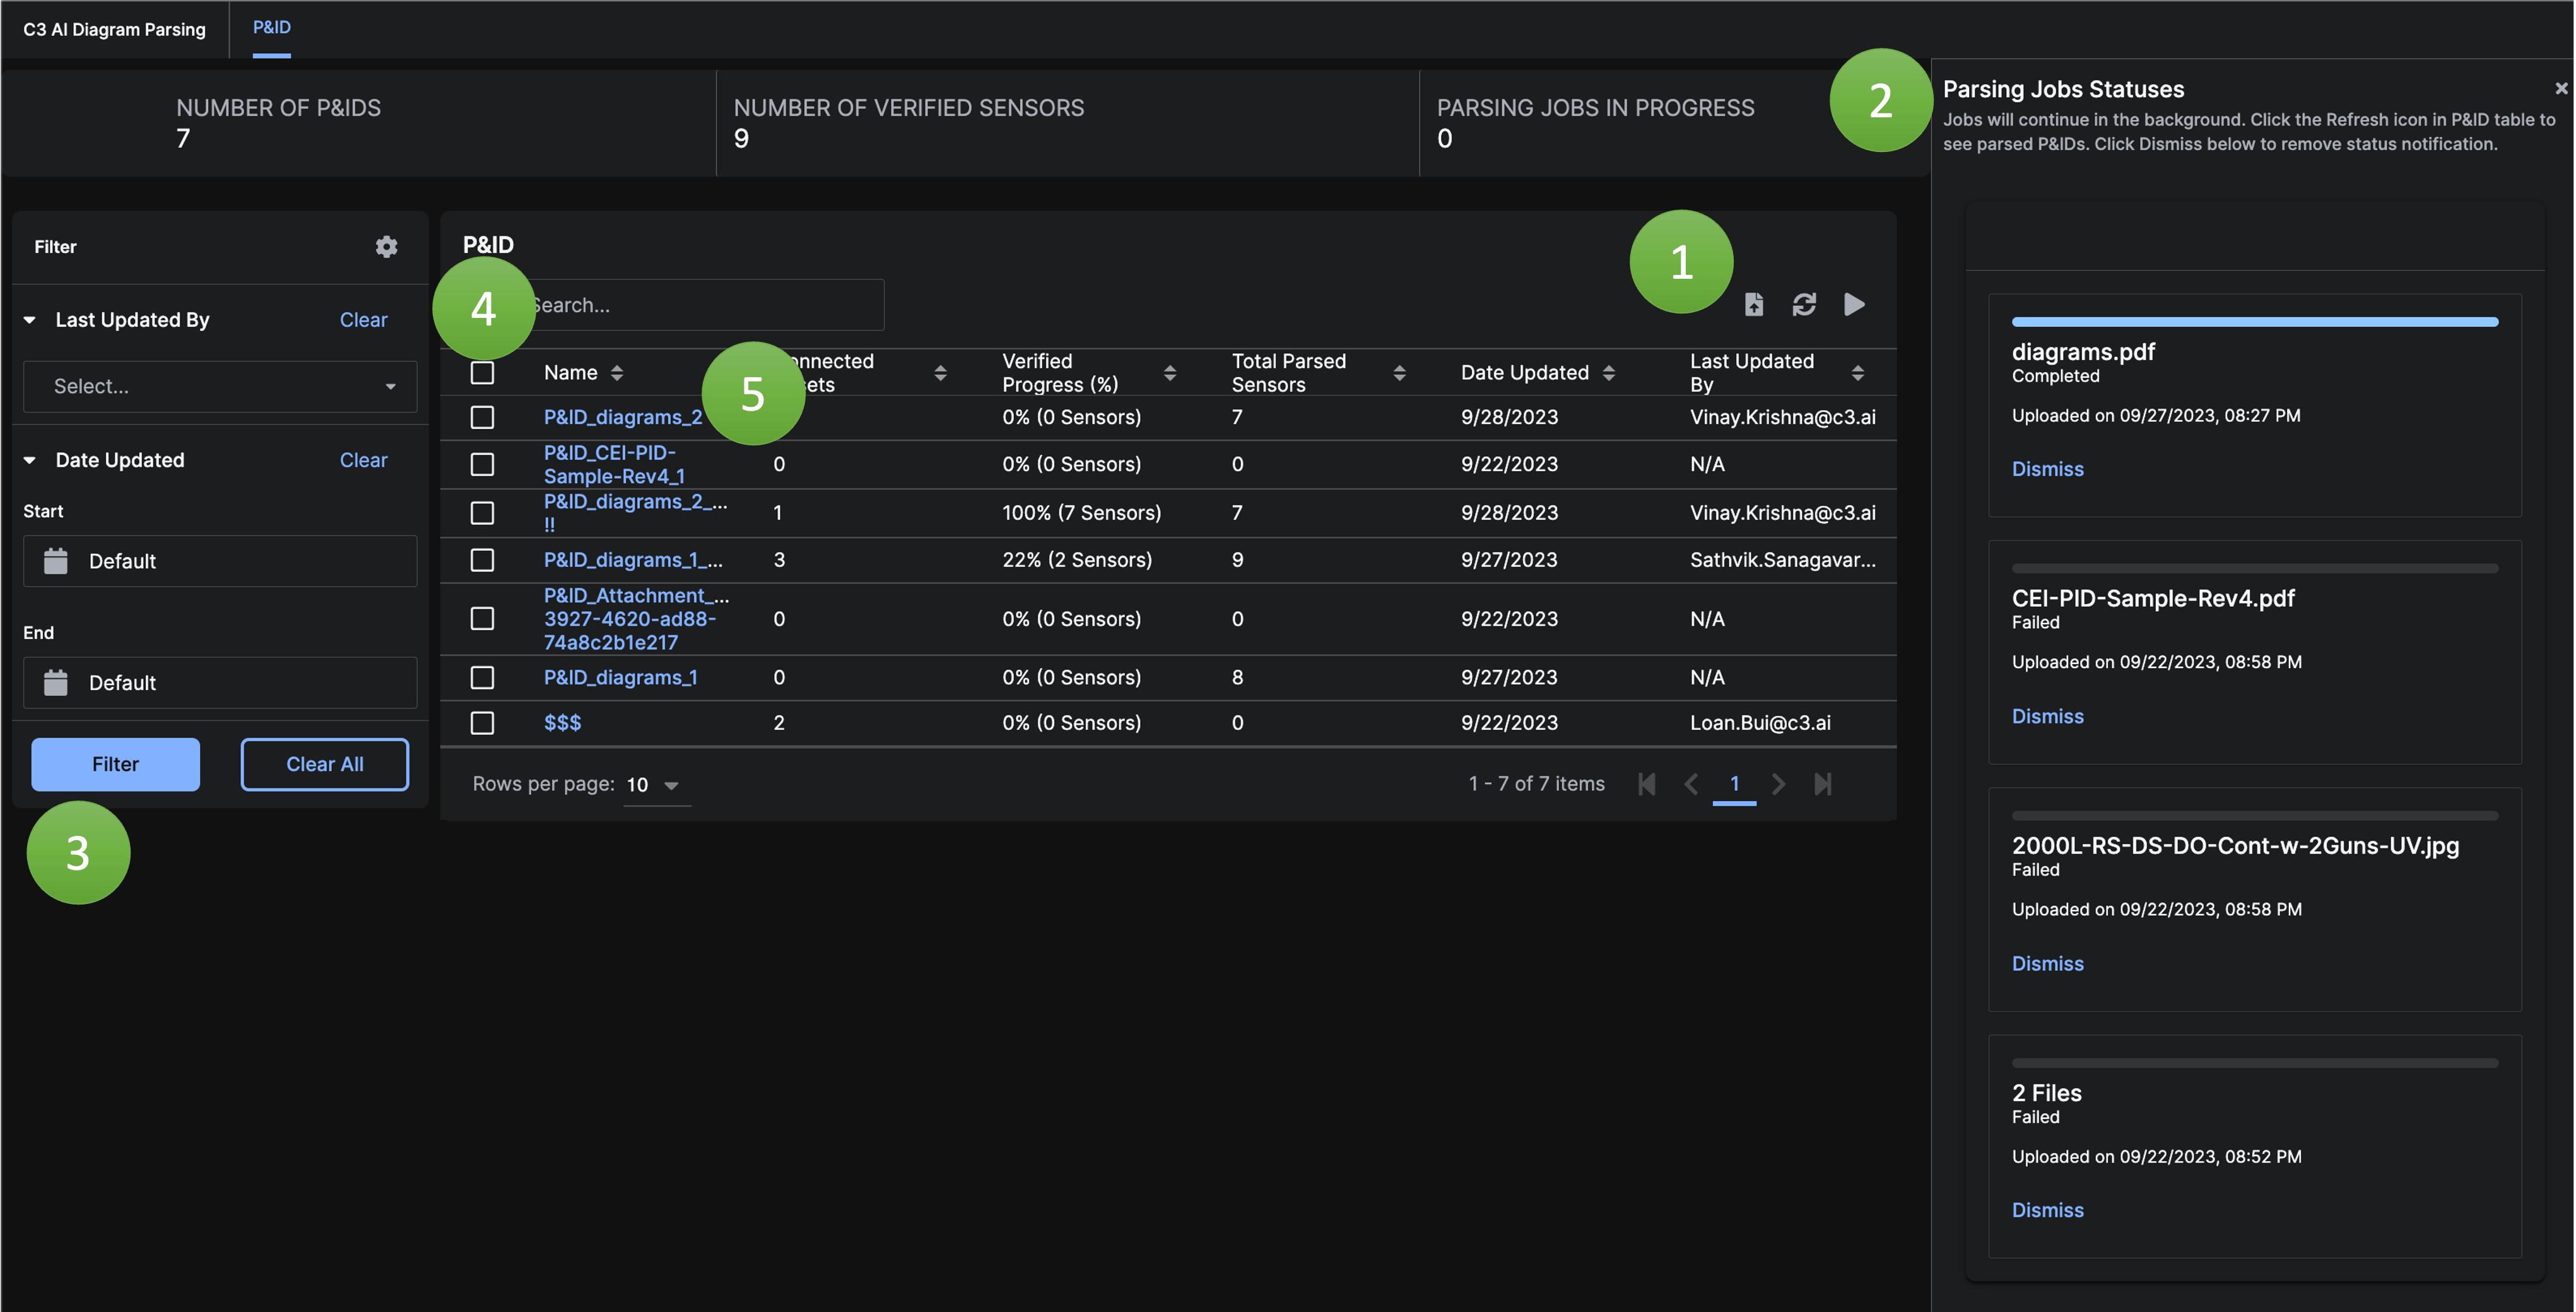
TheP&ID tab within the Asset Config allows you to manage the P&IDs that have been added.
- Click the upload icon in the grid to add and parse P&ID files. It may take a few minutes to completely finish parsing. Fully parsed P&ID files will appear in the grid.
- Click the play icon to check the status of in progress parsing jobs. Each upload will have a card that reflects its current step in the
Diagram Parsingworkflow. If you dismiss a card for an ongoing job, a new card will not display for that job as it progresses. - You can filter the list of P&IDs in the grid by who last updated the P&ID sensor verification and when the P&ID was last updated.
- Click the checkboxes and the trash icon to remove P&IDs and their sensor verifications from the application. This action cannot be undone.
- Click on the P&ID Name link in the grid to navigate to the Sensor Match Verification Page.
Sensor Match Verification
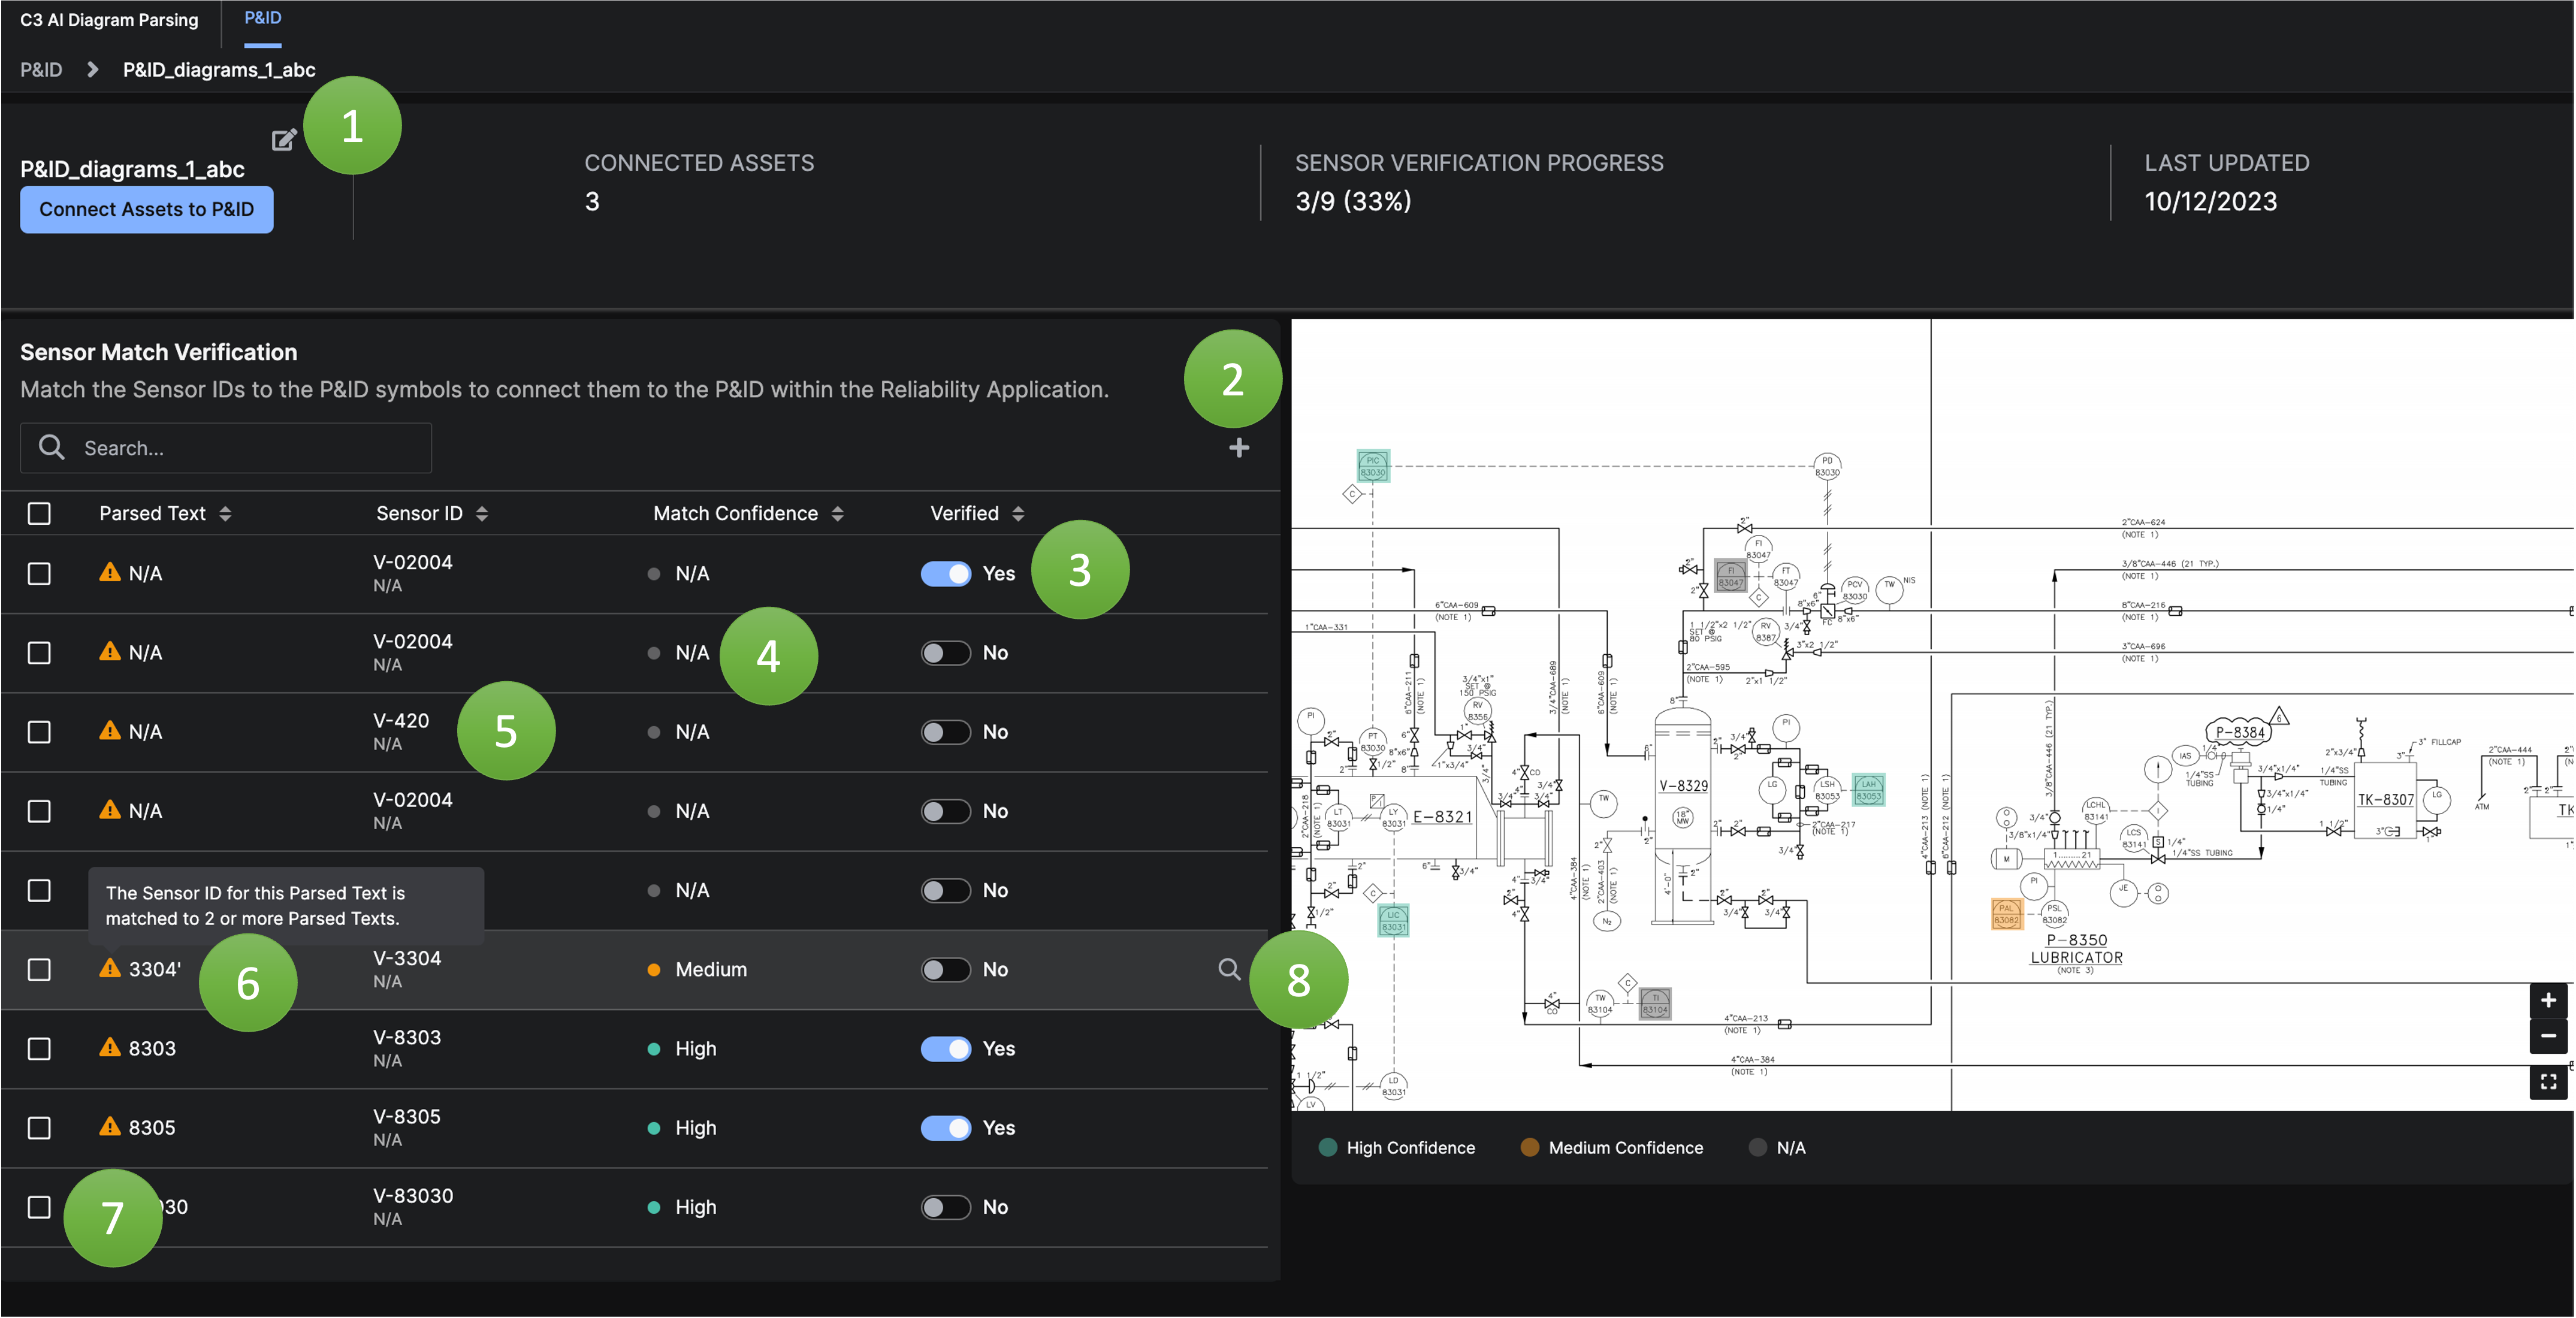
The Sensor Match Verification Page allows you to review theDiagram Parsing results and confirm the P&ID sensors with the matched data historian Sensor IDs. Verifying the matches enables data historian Sensor IDs to be connected to the P&ID and its location within.
- Click the edit icon in the header to edit the P&ID name in the application.
- If a P&ID sensor was not identified , Click the plus icon to associate a
Sensor IDto the P&ID. Currently, the sensor’s location on the P&ID is unable to be defined. - Click the toggle to verify and un-verify the
Sensor IDmatch to the P&ID and its parsed location on the P&ID. ASensor Idcan only be associated with one P&ID. - Review the match confidence score to help you prioritize which sensor matches require closer evaluation. The
Diagram Parsingmodel provides a match confidence of green, orange or red. The match confidence can be useful for prioritizing which sensor matches require closer user attention and evaluation. Matches manually applied by the user will be color-coded grey. Sensor IDsare matched to Parsed Text by theDiagram Parsingmodel or matched by a user. To manually match aSensor ID, hover over aSensor IDwithin a row and click the edit icon. A list ofSensor IDswill display in a dropdown; entering in a few characters will refresh the dropdown with a new list ofSensor IDs. If you still do not see the desiredSensor ID, it could either be because theSensor IDwas already verified to another P&ID sensor or theSensor IDhas not yet been integrated by your company.- The
Parsed Textis aDiagram Parsingoutput. It is associated with a sensor location on the P&ID. If its matchedSensor IDis also matched to a differentParsed Text, you will see a warning icon. TheParsed Textdoes not have to be exact for theSensor IDto be verified to the P&ID and its location within. - Click the checkboxes to bulk verify or delete
Sensor Matchrows. The delete action cannot be undone. - Hover over a
Sensor Matchrow and click on the search icon to focus the diagram viewer on the parsed symbol. TheParsed Textmay not perfectly match the text within the symbol, but theSensor IDand P&ID symbol should refer to the same sensor. If theSensor IDand P&ID symbol are not referring to the same sensor, revise the ‘Sensor Id’ as described in step 5.
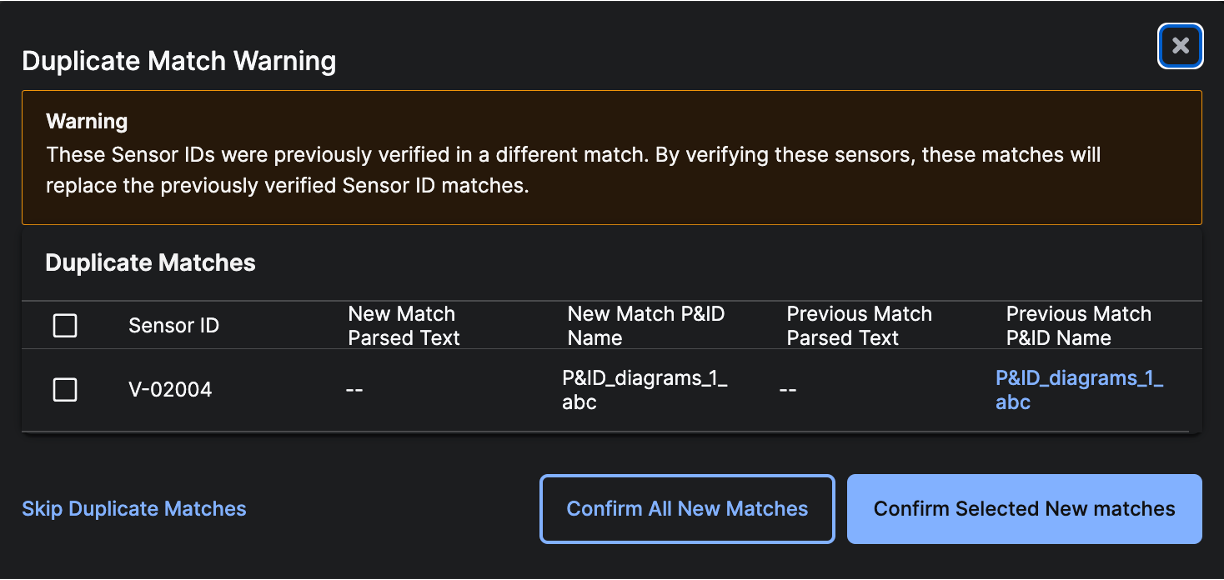
Sensor Verification Errors
ASensor ID can only be verified once. If a Sensor Match row is being verified and contains a Sensor ID verified elsewhere, a Duplicate Match Warning Modal will display the conflict. You can select which Sensor ID(s) should be matched to the new Sensor Match rows.
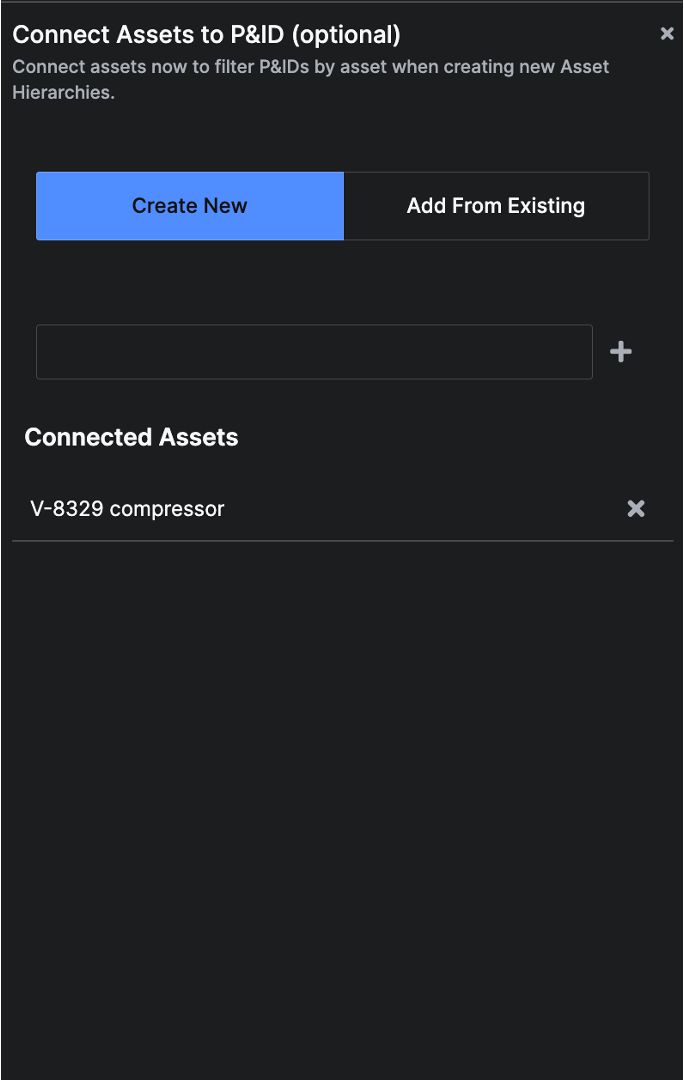
Connected Assets
To enable searching P&IDs by equipment or systems, you can associateReliability Assets to the P&ID. You can create a new Asset by typing in the Asset name and clicking the plus icon. Or, you can add an existing Asset by searching the dropdown for the desired Asset. You can remove an Asset association from the P&ID by clicking the x icon next to the Connected Asset.