TheDocumentation Index
Fetch the complete documentation index at: https://devdocs-shaunak-branch.mintlify.app/llms.txt
Use this file to discover all available pages before exploring further.
Asset Config module enables construction of asset hierarchies. As part of this module, there are workflows to create assets, map sensors to assets, parse P&ID diagrams to match parsed text to sensors, and view Failure Modes and diagnostic information.
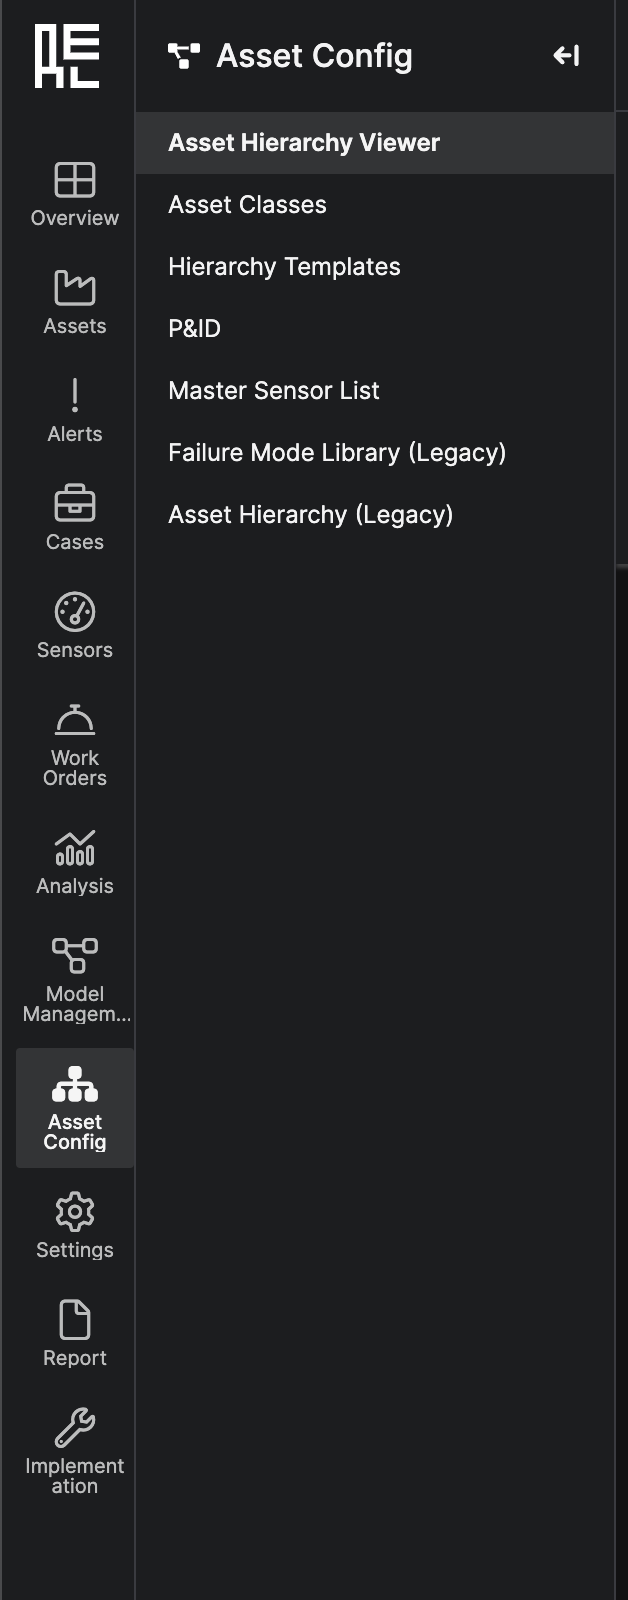
The Asset Config module is organized in a series of sub-pages, shown in the secondary left-navigation bar. The sub-pages include:
- Asset Hierarchy Viewer
- Asset Classes
- Hierarchy Templates
- P&ID
- Master Sensor List
- Failure Mode Library (Legacy)
- Asset Hierarchy (Legacy)
Asset Hierarchy Viewer
The Asset Hierarchy Viewer gives you the ability to create and edit the asset hierarchy for the deployment from the UI. This page is only available to users with the “Asset Onboarding Administrator” role, and it contains several features to help you set up your asset hierarchy for the first time.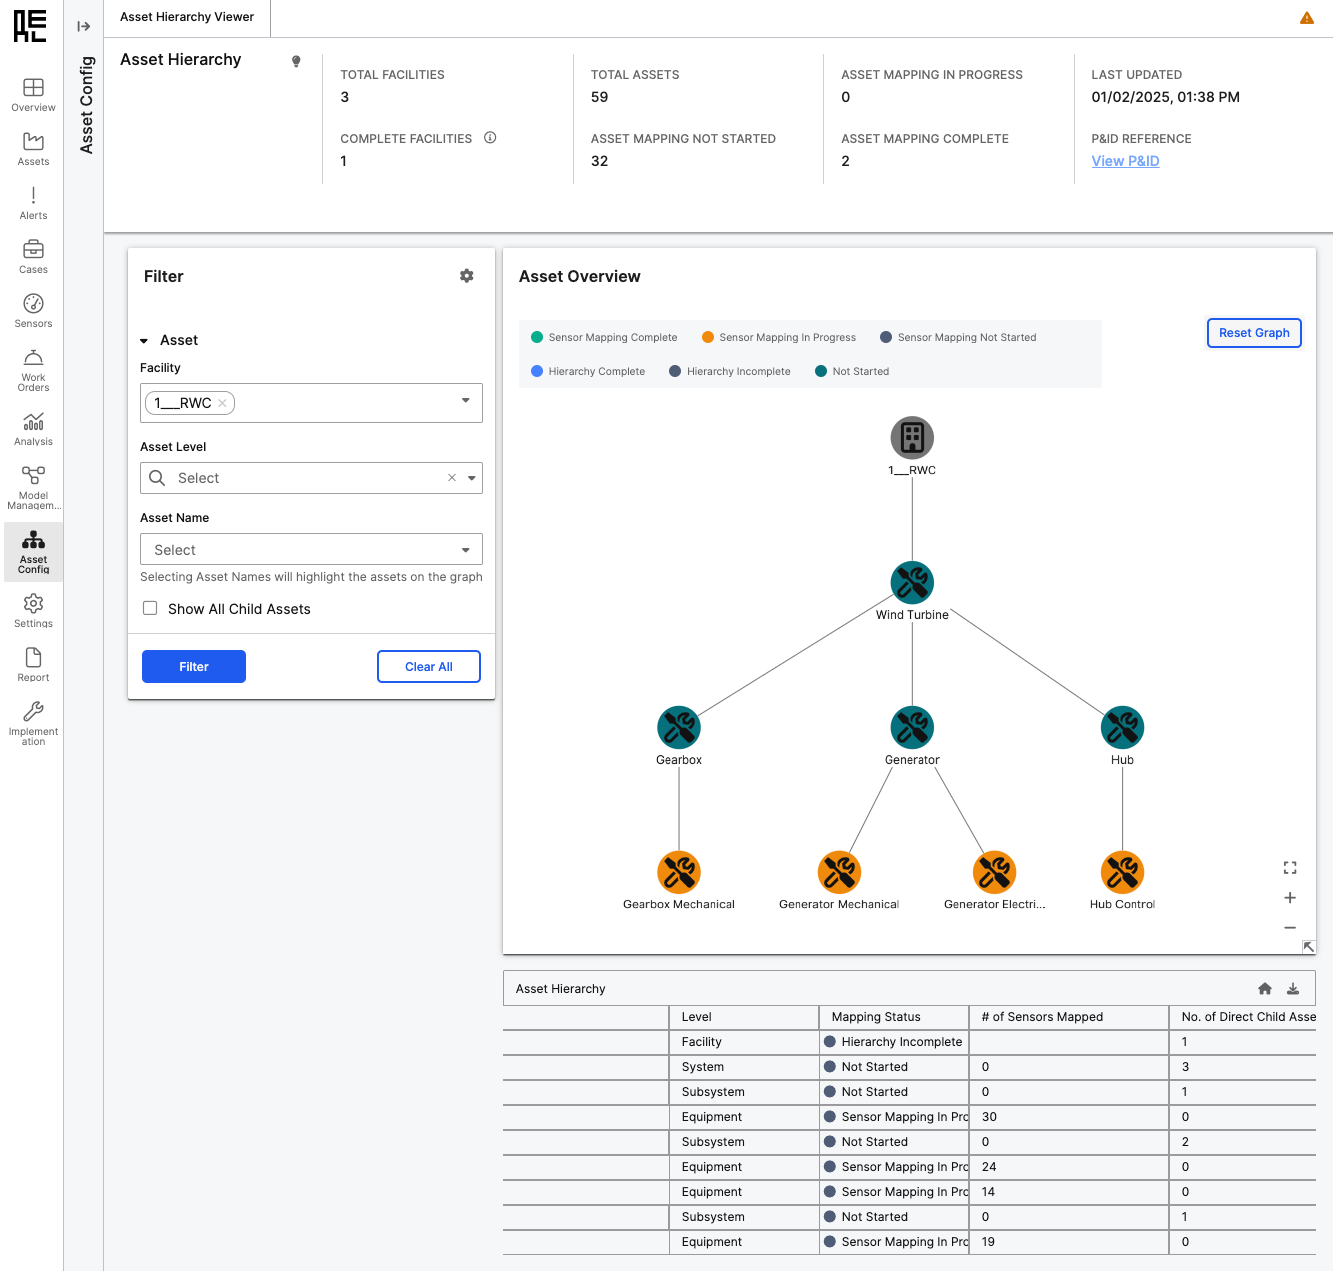 There are two main ways to interact on the Asset Hierarchy Viewer page:
- Graph Component - you can use the filter panel to filter the graph of assets shown. You can also click on assets in the graph to open a side-panel menu of potential actions to perform on the asset, including adding child assets, duplicating the asset, mapping sensors to the asset, and more. You can also perform typical editing actions such as editing the name, deleting, or moving the asset.
- Asset Hierarchy Table - you can view the current filtering of the graph’s assets in a tabular form in the Asset Hierarchy table. Use the arrows to expand or collapse child assets. There are also buttons to create new facilities, perform actions on child assets, or download the entire asset hierarchy.
Asset Hierarchy Viewer page, please view the Building Asset Hierarchies Page.
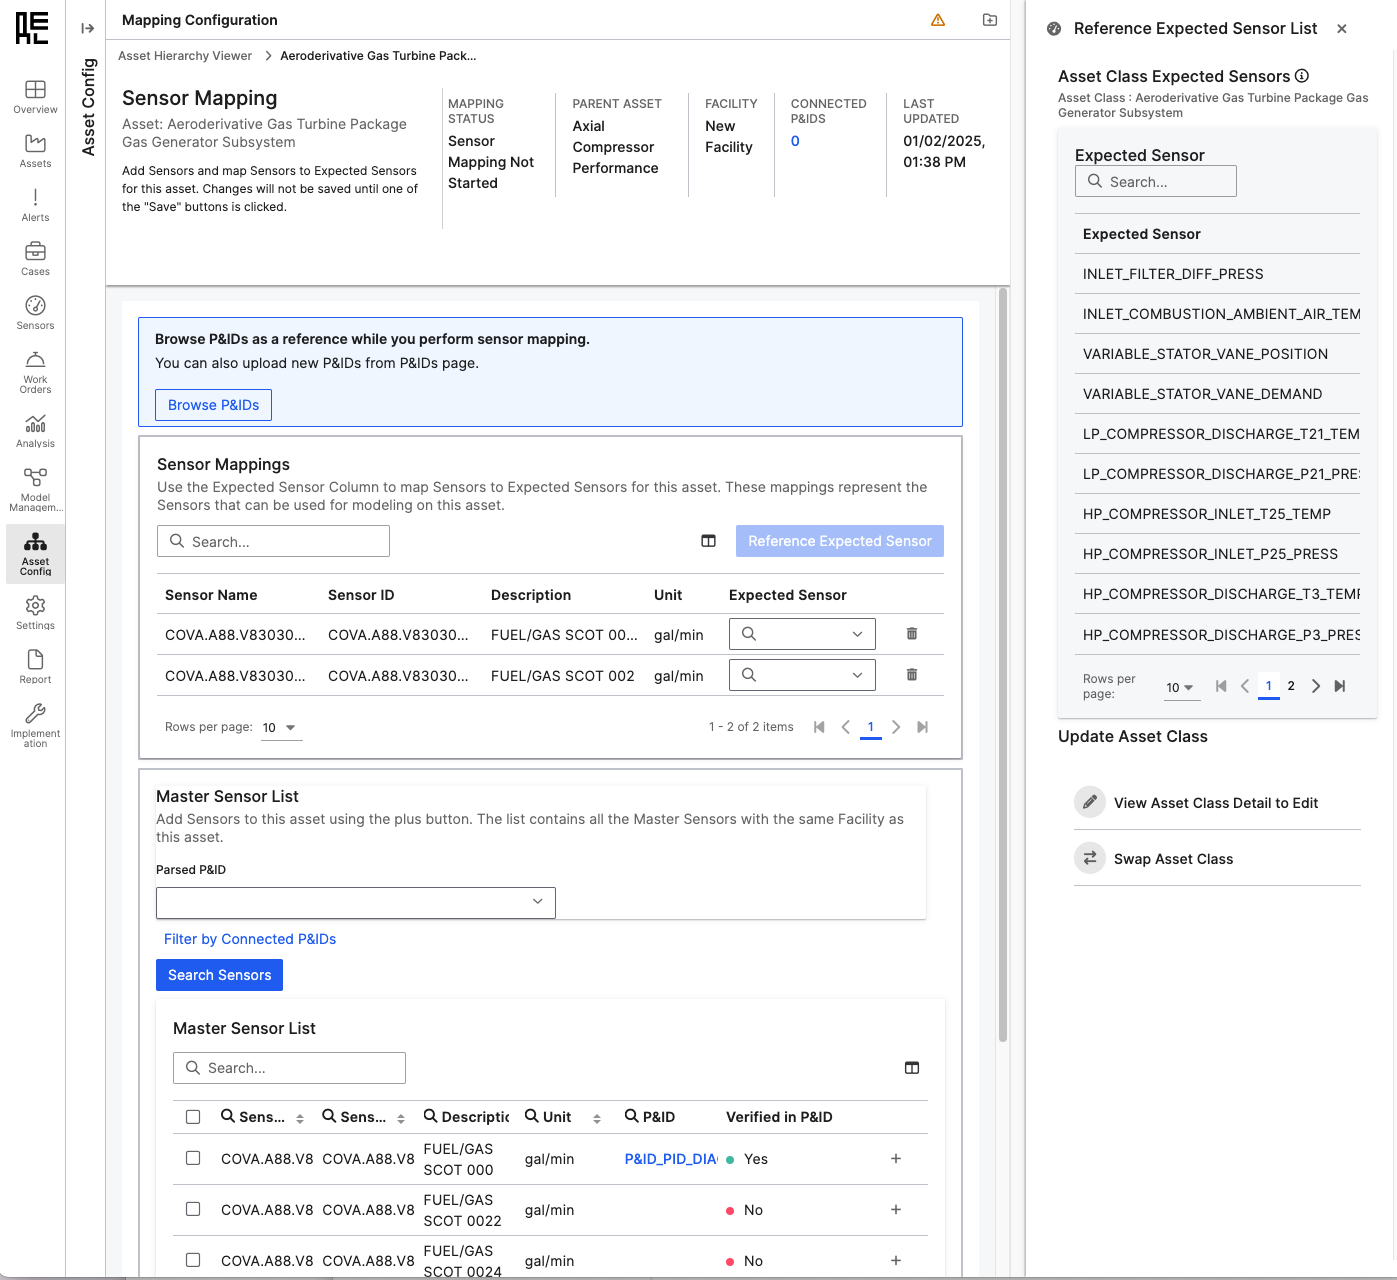
Sensor Mapping Page
From any asset within a hierarchy, you can navigate to the asset’sSensor Mapping page by pressing the Map Sensors action on that asset. This page shows the full list of available sensors for the asset’s facility in the Master Sensor List grid. Sensors can be mapped to the asset by pressing the ”+” sign on a sensor row, which adds the sensor to the Sensor Mappings grid. Once mapped to the asset, an Expected Sensor from the asset’s Asset Class can also be matched to the sensor.
Performing these steps creates the appropriate relational hierarchy so that sensors are attached to the asset, mapped to Expected Sensors, and are ready to be used in ML modeling.
Asset Classes
The Asset Classes page displays all the availableAsset Classes in the application. Asset Classes are a conceptual grouping that help to define types of assets. Assets with the same Asset Class share a similar purpose, have sensor measuring the same concepts, and tend to fail in similar ways. Accordingly, an Asset Class defines the set of Expected Sensors and Failure Modes that are common to these assets.
Clicking on any Asset Class name will lead you to the `Asset Class Detail page.
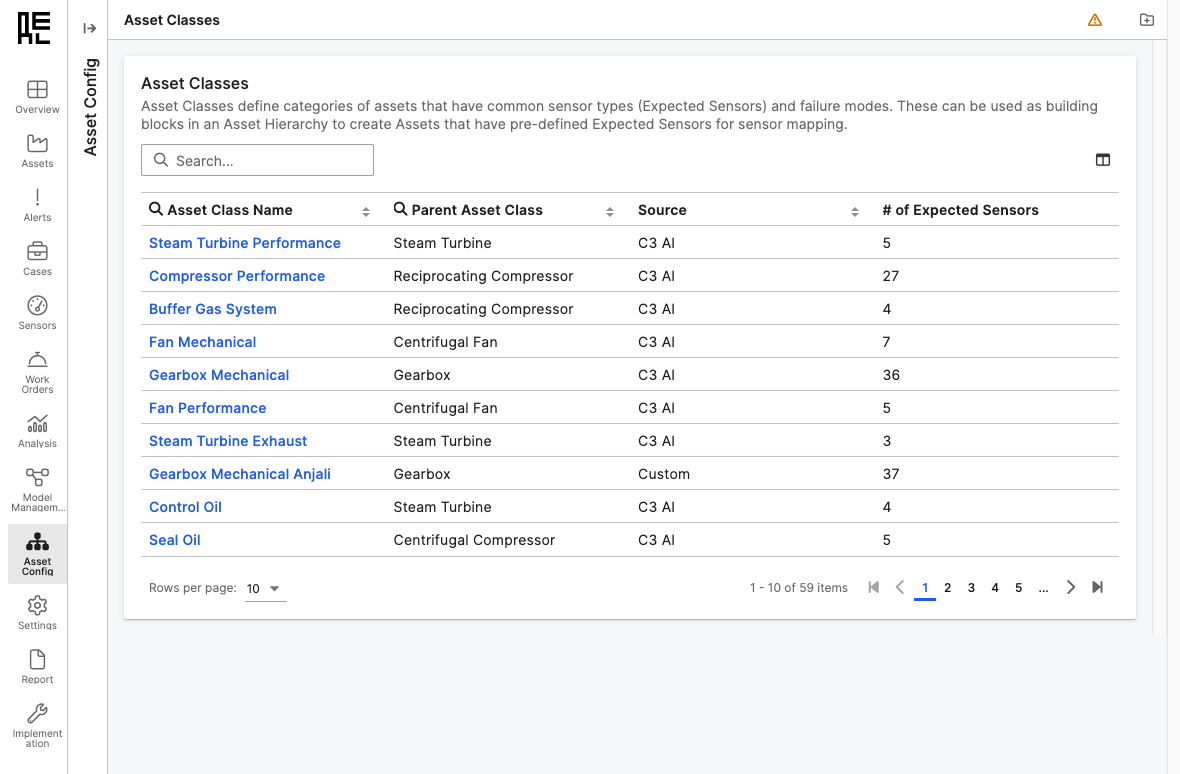
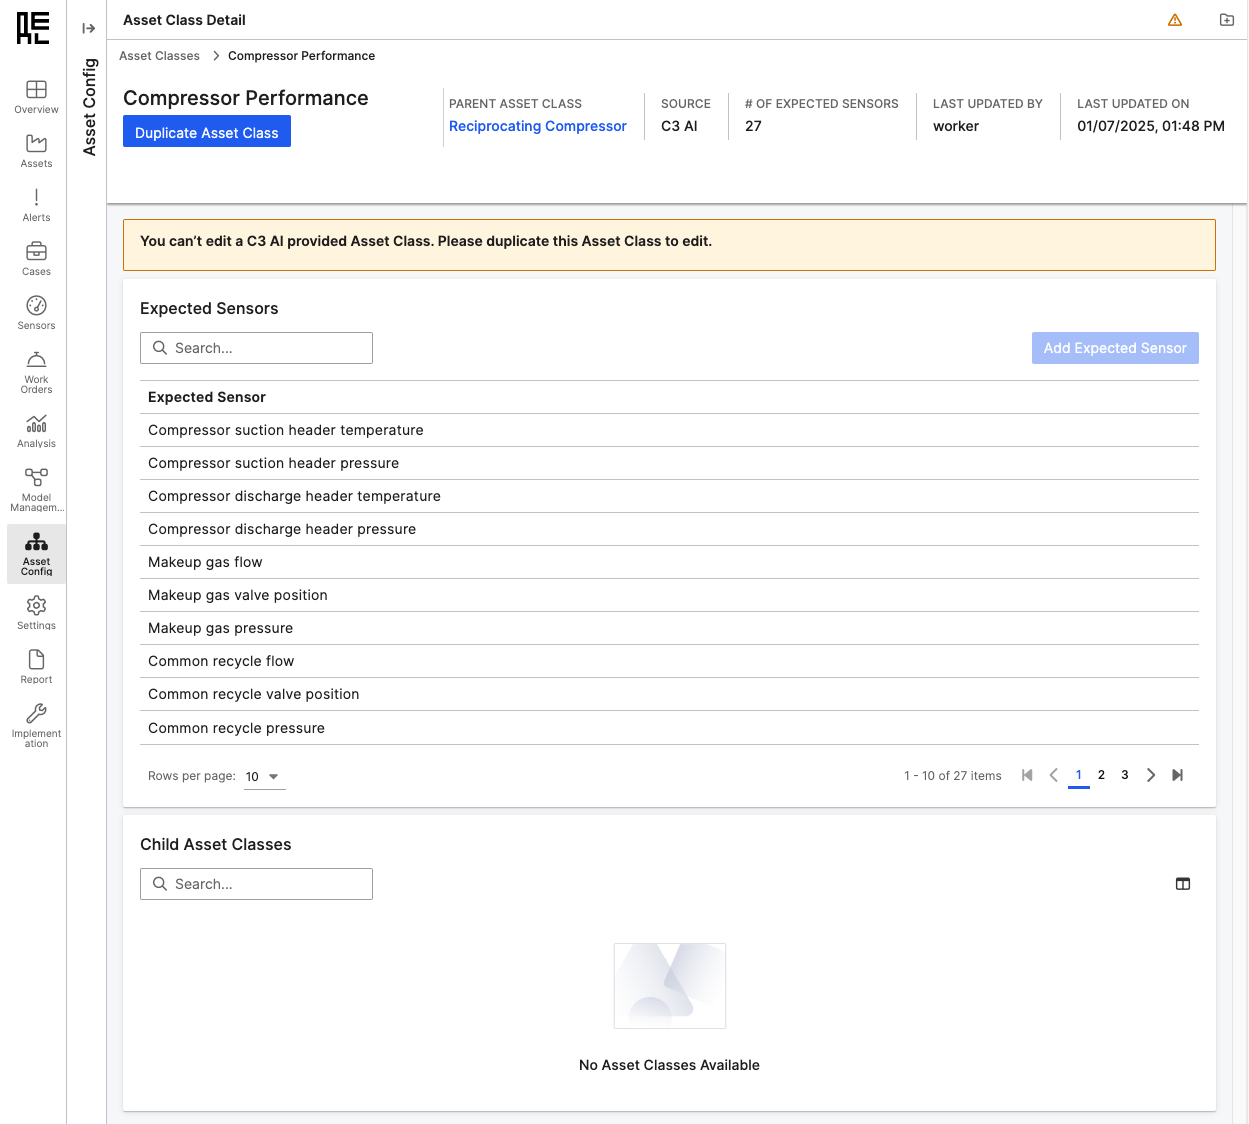
Asset Class Detail
The Asset Class Detail page provides information about the characteristics that are specific to theAsset Class. On this page, you can view the Expected Sensors that are part of this Asset Class. You can also view the Parent Asset Class and any Child Asset Classes, if applicable.
C3 AI provides several out-of-the-box Asset Classes that are available for use while building asset hierarchies. While the C3 AI provided Asset Classes are not editable, you can use the Duplicate Asset Class button to make a copy of the Asset Class that will be custom to your deployment. Once copied, you can edit your custom Asset Class to add additional Expected Sensors, if desired.
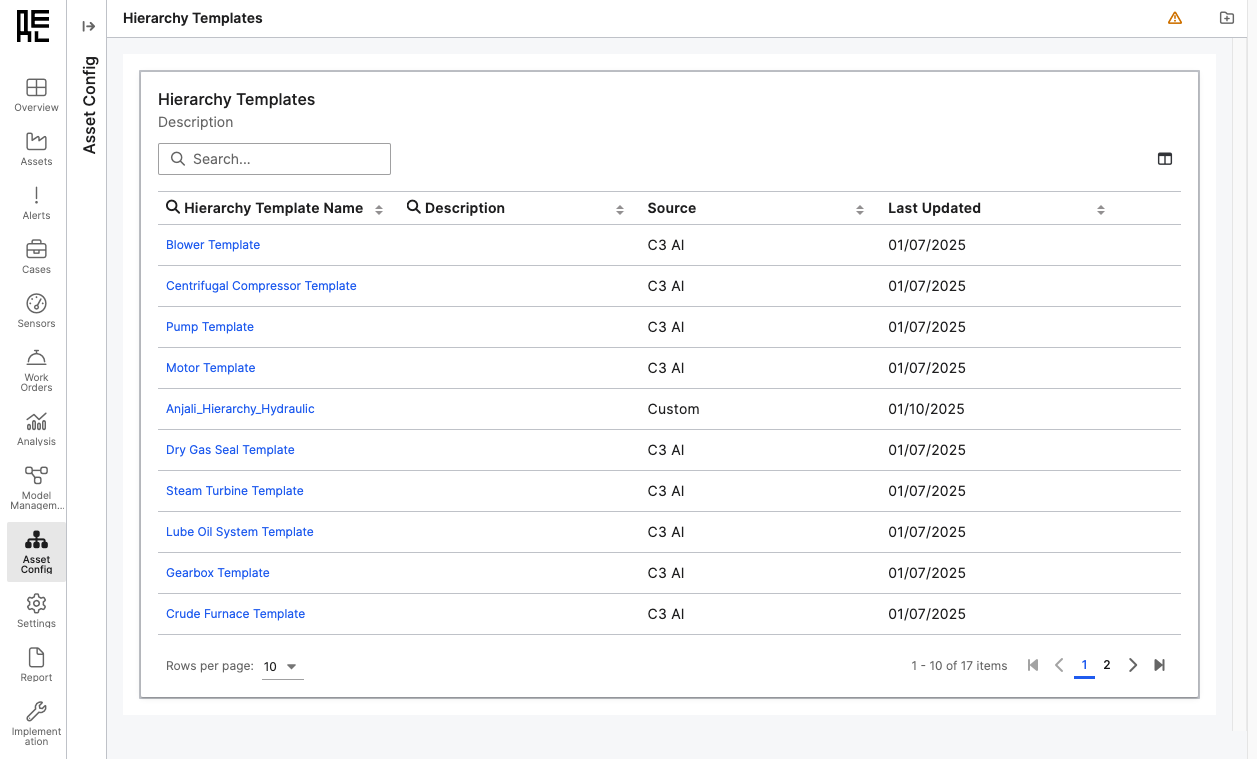
Hierarchy Templates
The Hierarchy Templates page displays all the availableHierarchy Templates in the application. Hierarchy Templates are templates that can be applied to create a preconfigured asset hierarchy, which contains one or more assets. These templates can be applied to a specific asset or facility when building out an asset hierarchy, and that asset or facility will become the parent of the new asset hierarchy.
C3 AI provides several out-of-the-box Hierarchy Templates that might be useful starting points as you build out your asset hierarchy. However, if you have your own configurations of assets that might be useful to use throughout your deployment, you can also create and save your own Hierarchy Templates as an action from any asset on the Asset Hierarchy Viewer page.
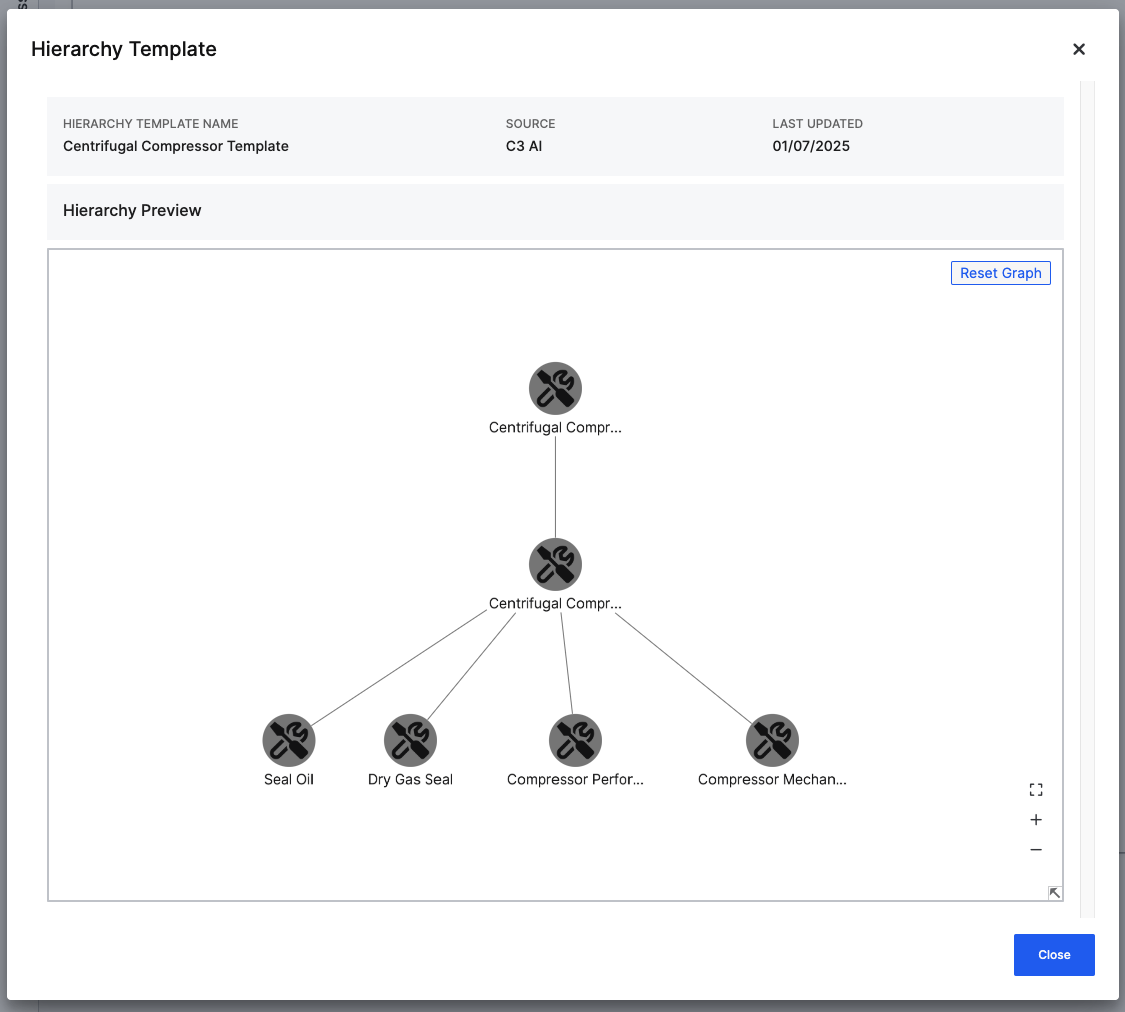
Clicking on any Hierarchy Template name will pop up a modal showcasing a preview of the assets contained in the Hierarchy Template.
P&ID
TheP&ID tab gives you the ability to upload your facility P&IDs to the application. For more information on this worfklow, go to the Reliability P&ID Page.
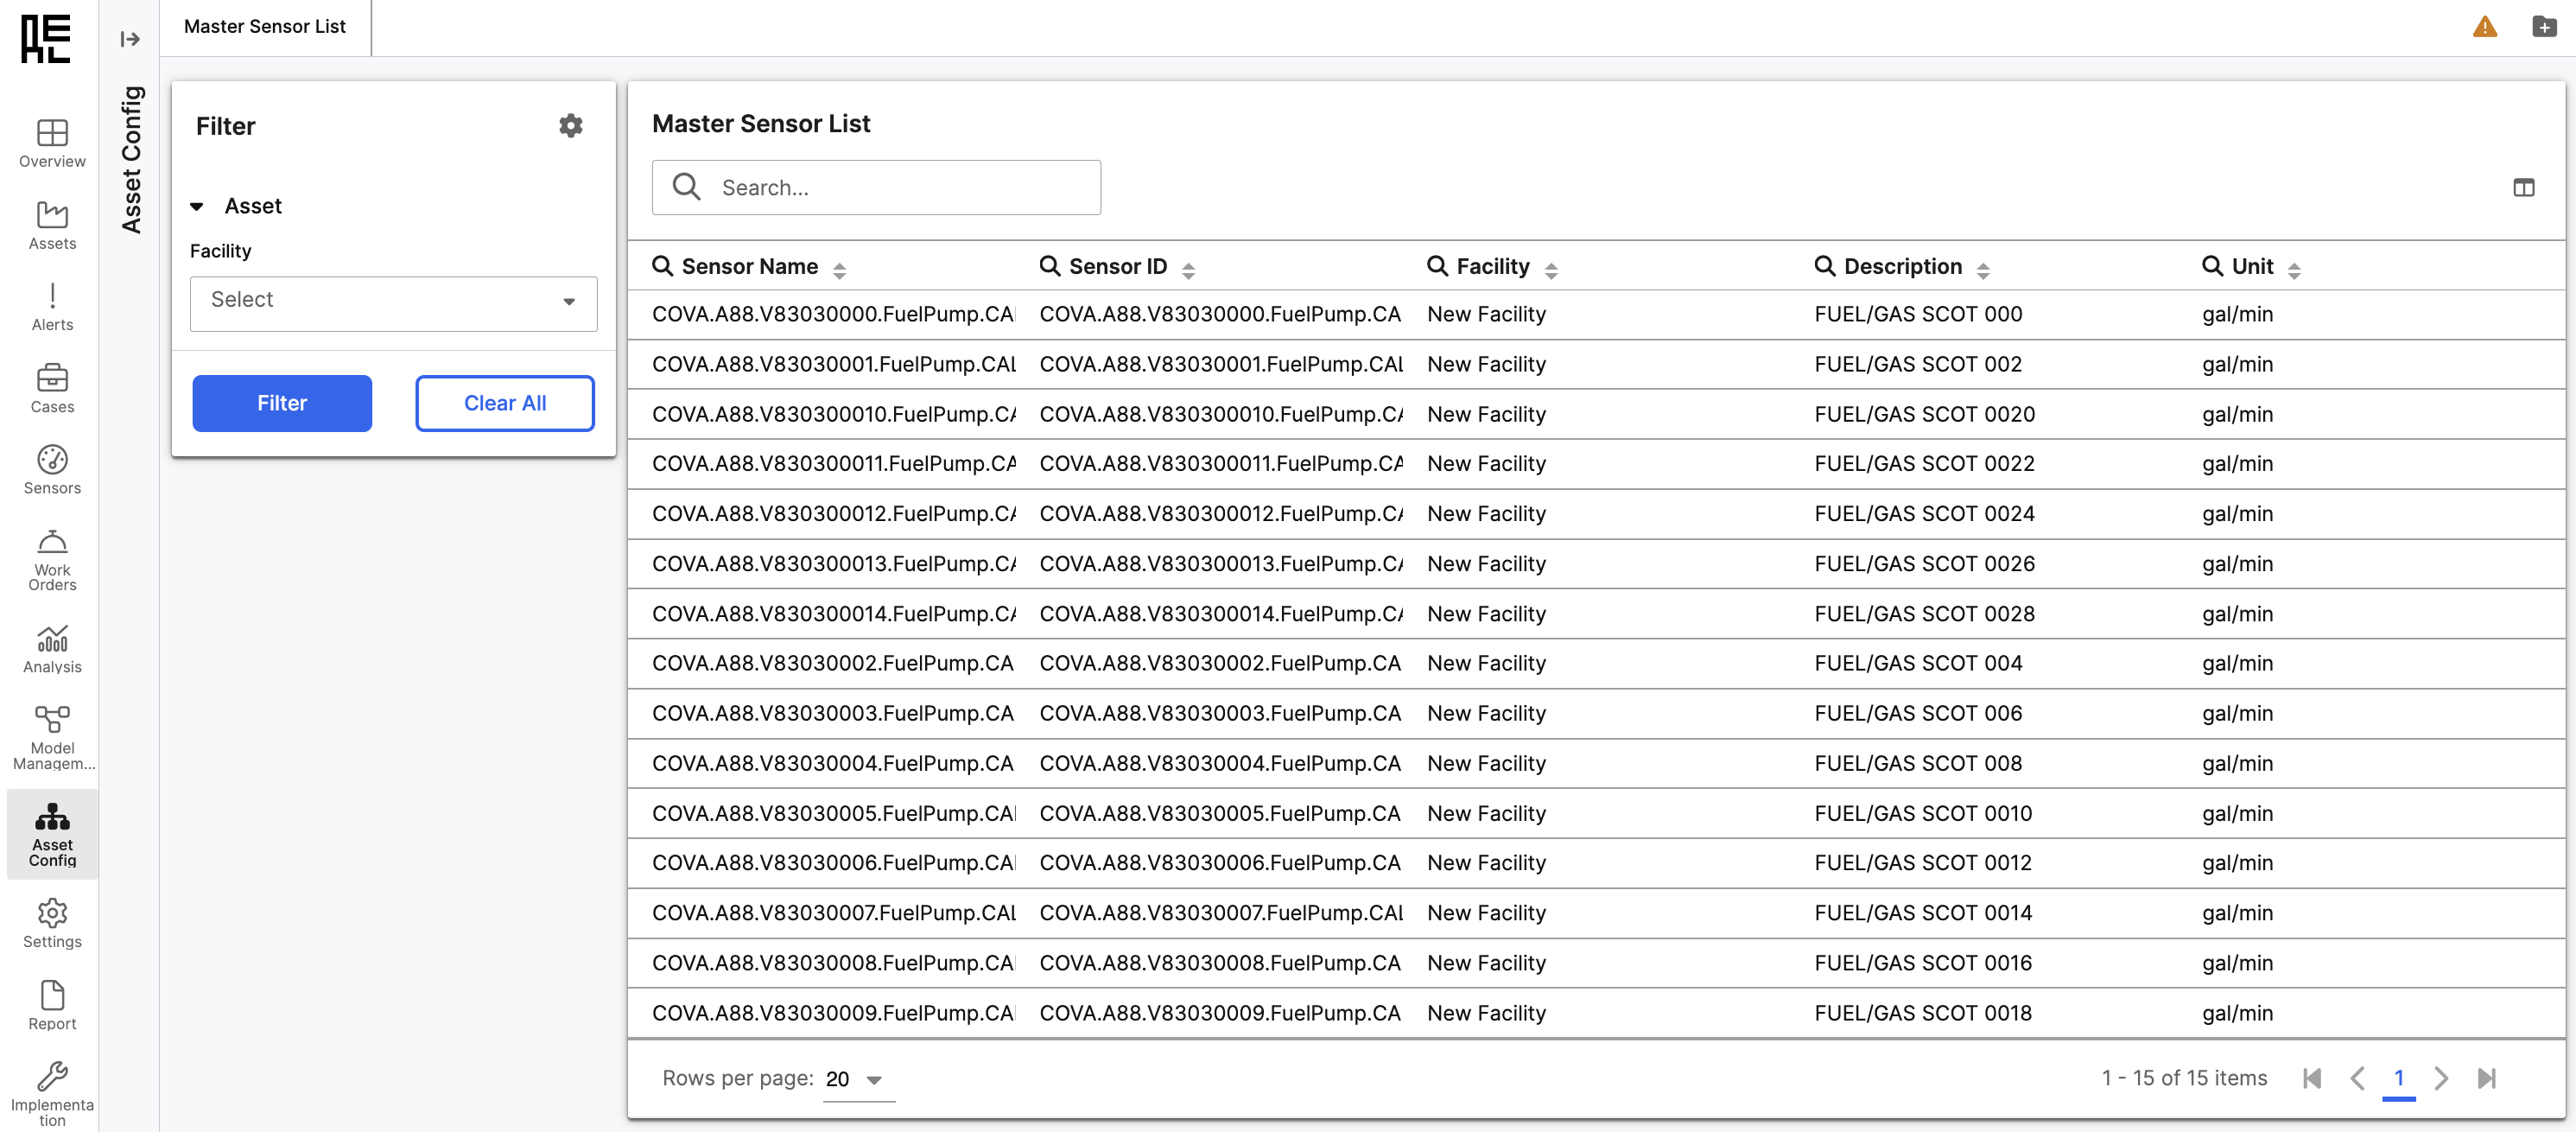
Master Sensor List
The Master Sensor List Page displays all of the sensors that are available for mapping to assets. Here, you can filterMaster Sensors based on Facility. You can also view these attributes about the sensors:
- Sensor Name
- Sensor ID
- Facility
- Description
- Unit
Failure Mode Library (Legacy)
The Failure Mode Library tab displays the type of data the sensor is measuring, what failure modes that data can indicate, diagnostic information, the priority of alerts that are generated, expectations, fault category, how the data is measured, and possible solutions (based on AI algorithms).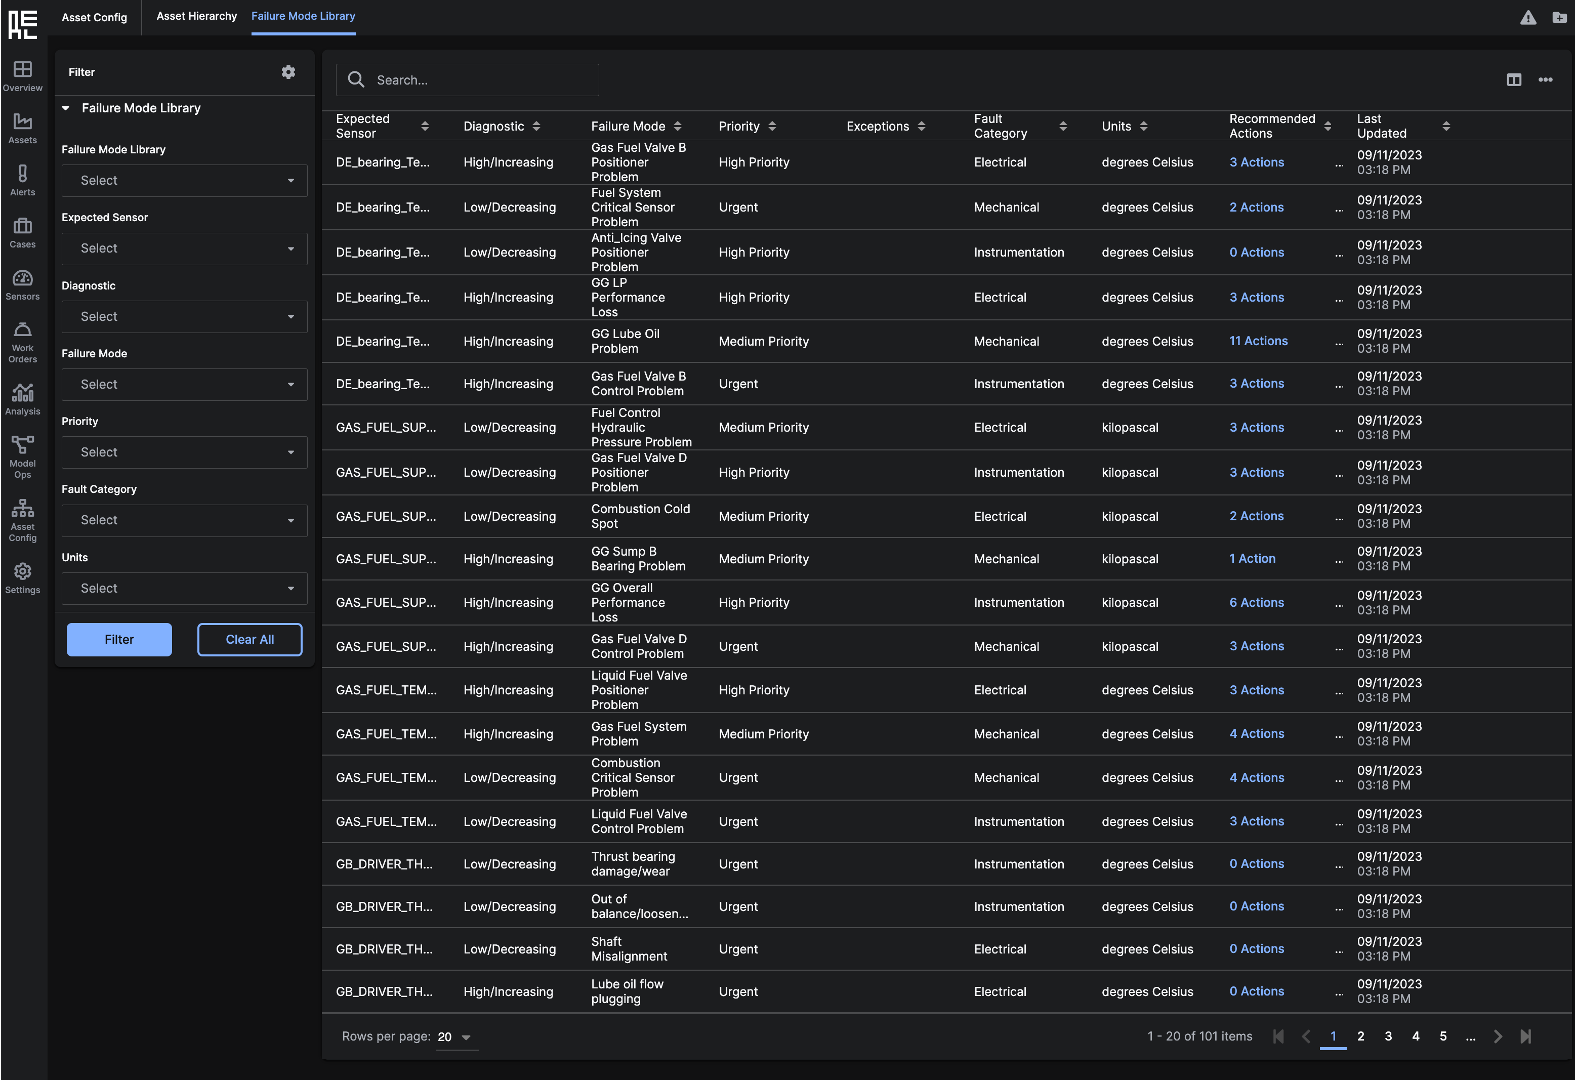 The upper right corner of the
 Failure Mode Library tab contains an Edit Column icon that allows you to edit the columns displayed in the Failure Mode Library grid. Next to the Edit Column icon is an ellipsis (…) icon that allows you to add and remove data from the Failure Mode Library.
Asset Hierarchy (Legacy)
The Asset Hierarchy tab displays the Sensor’s Facility, Parent Asset, and Conceptual Asset Relation. It also shows whatExpected Sensor is matched to it for the Asset. Clicking on an Asset Name for a Sensor will redirect to the Asset Details Page.
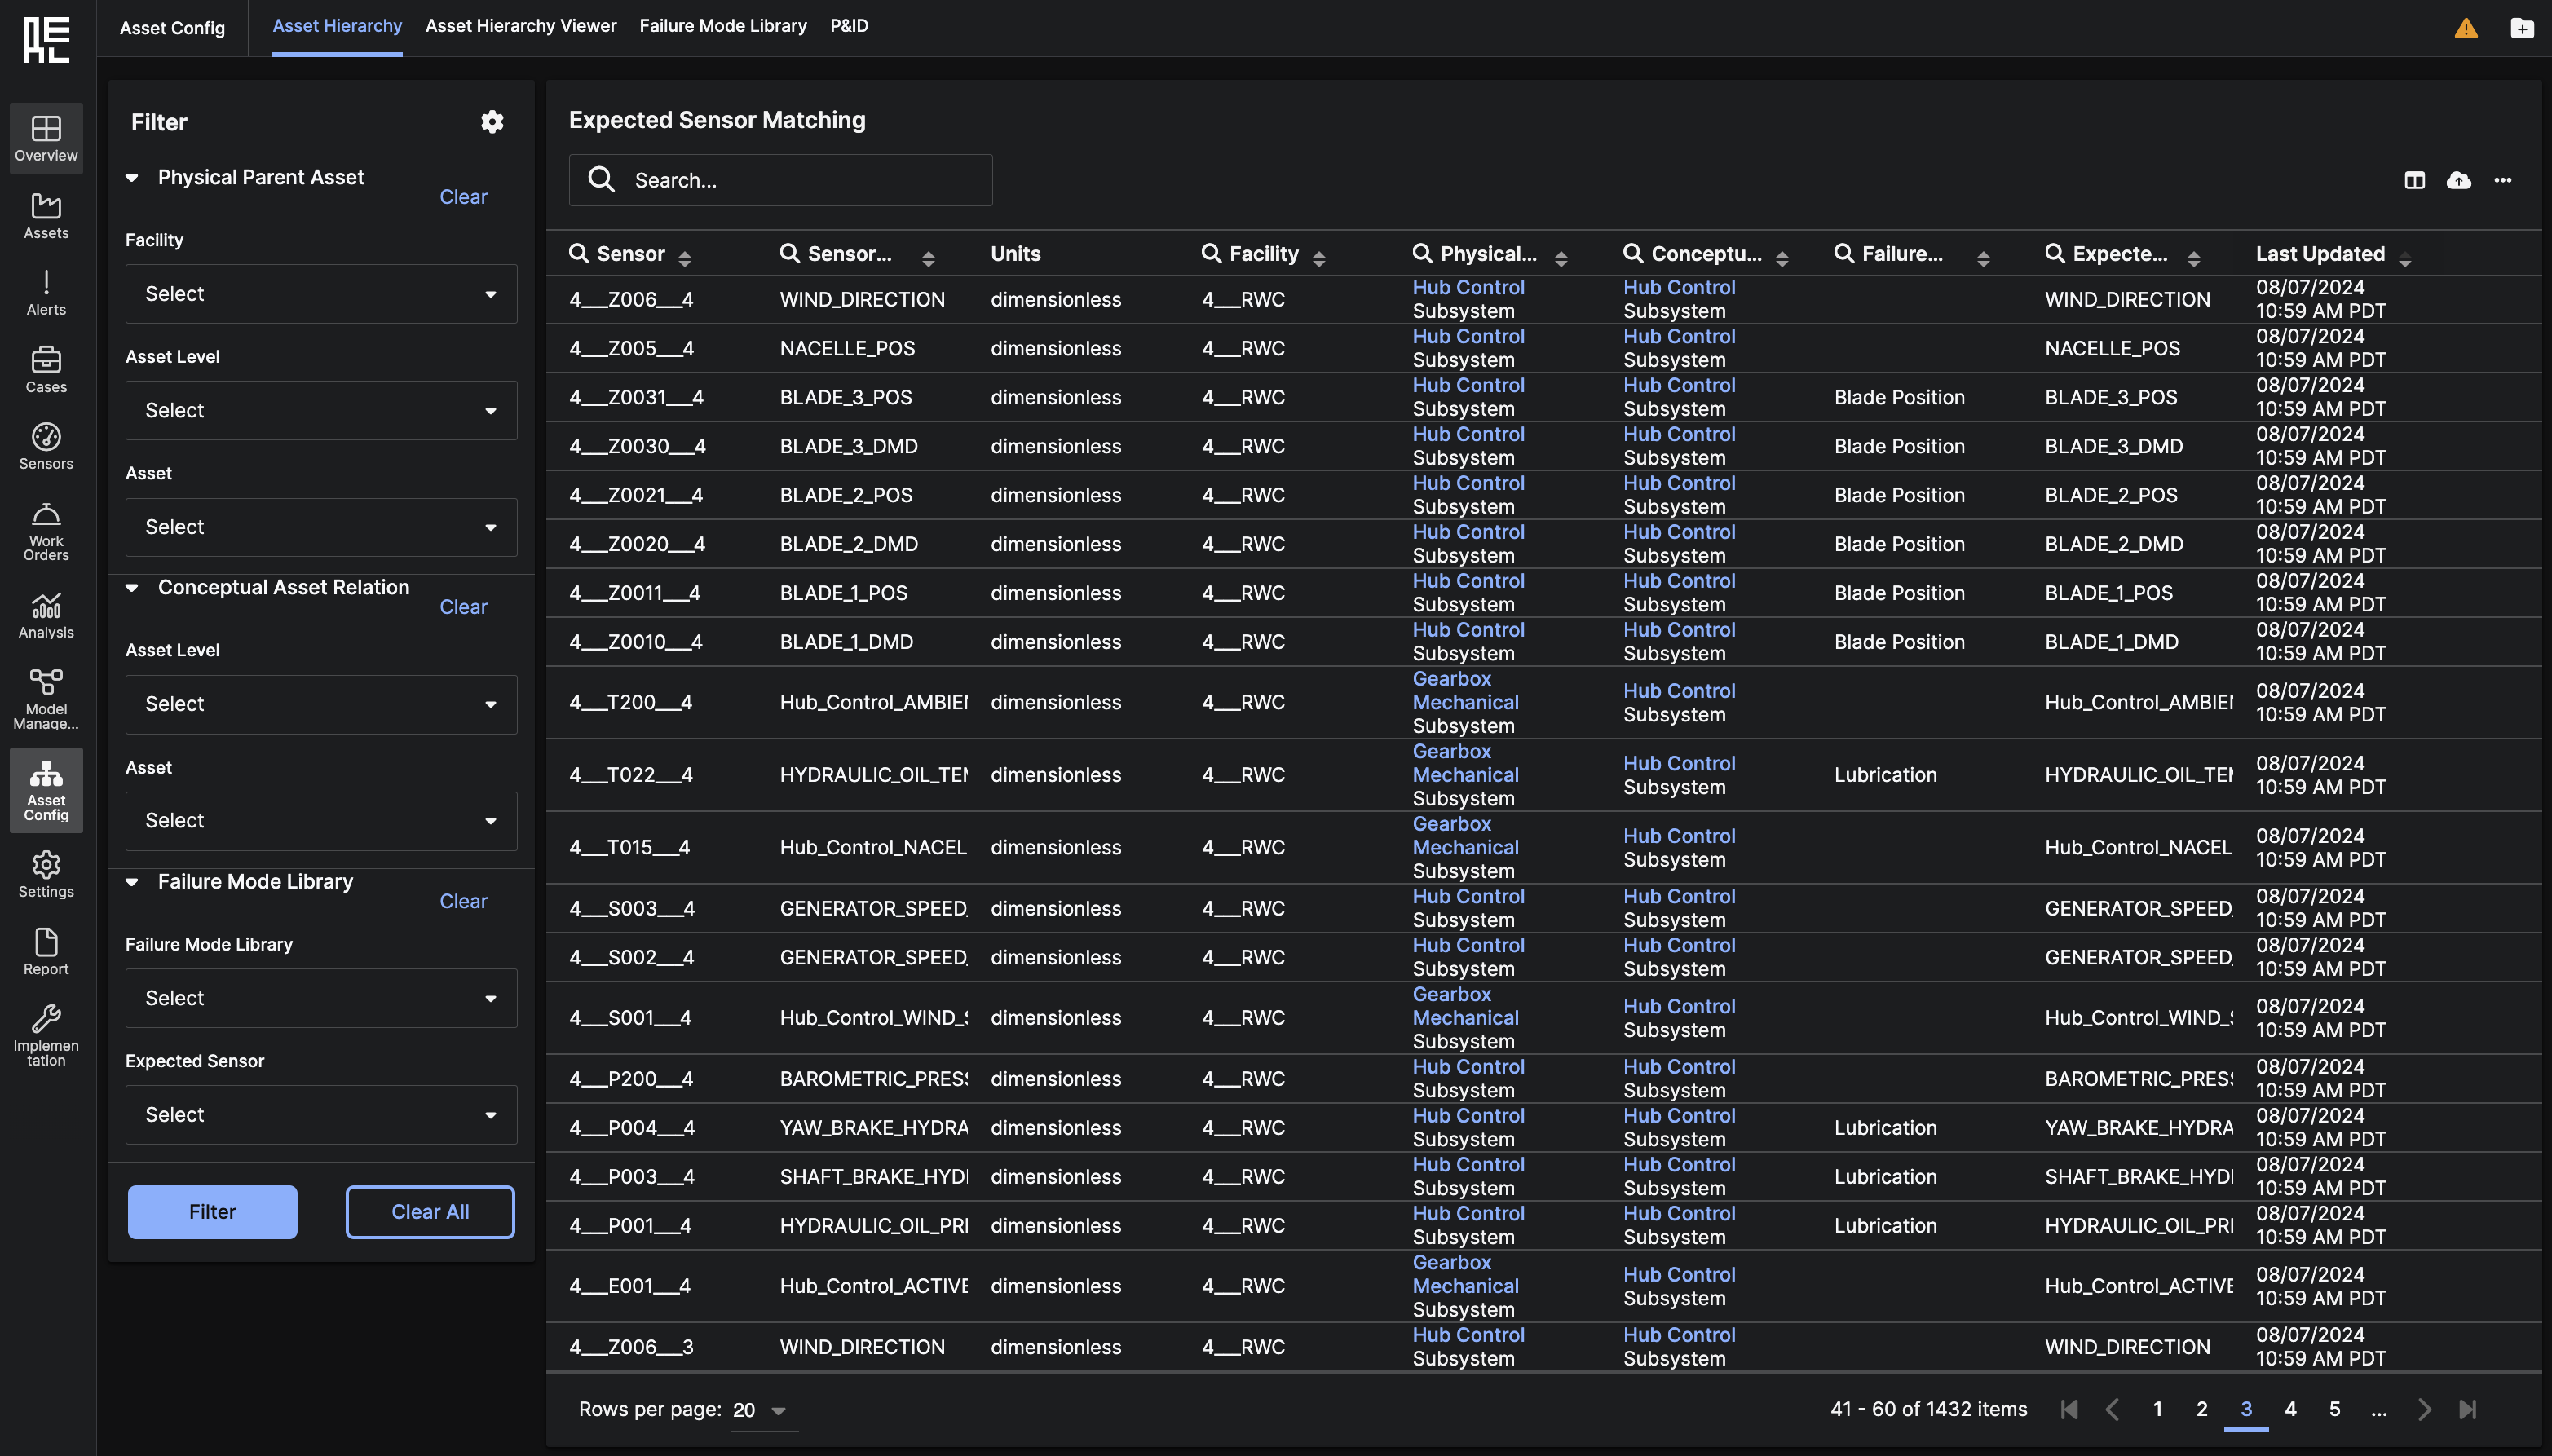 You can customize the table contents to display only the data that you want to see. The upper right corner of the table contains an Edit Column icon that allows you to edit the columns shown.
Next to the Edit Column icon is an ellipsis icon (…) icon that allows you to add entities to the Asset Hierarchy.
You can customize the table contents to display only the data that you want to see. The upper right corner of the table contains an Edit Column icon that allows you to edit the columns shown.
Next to the Edit Column icon is an ellipsis icon (…) icon that allows you to add entities to the Asset Hierarchy.